Page 24 of 46
Re: Home away from Home, on wheels.
Posted: Wed Dec 19, 2012 2:08 pm
by Tom
Interesting, I have to see how it connects to the heater flapper in the front, it's not clear on the diagram.
Re: Home away from Home, on wheels.
Posted: Wed Dec 19, 2012 6:21 pm
by Tom
There seems to be a consensus that those tubes are for 78 and 79 models, you may have them because of an engine transplant or possibly a late production 77.
http://www.thesamba.com/vw/forum/viewtopic.php?t=465936
Re: Home away from Home, on wheels.
Posted: Thu Dec 20, 2012 1:39 am
by ObnoxiousBlue
Bus was built 7/27/77 M code indicates the bus was a 78 model year, though it is tagged as a 77. Which is interesting because the fuel line routing is the hard lines found on 78-79 as well. A simple change I'm aware. But I would gander at saying late production.
The bus was built CA emissions, so that also seems to be part of the issue.
My M code plate is decoded a couple pages back... Lol
I don't know what page, as I'm looking at the copy saved on my computer.
Re: Home away from Home, on wheels.
Posted: Mon Dec 24, 2012 6:05 pm
by ObnoxiousBlue
Got the call around noon, "You're done"
Picked the bus up by 1. Got it home, looking good. Happy with the corner and the side. Though not completely thrilled with the job on the dogleg. It looks fantastic, color match is dead on. But the backside of the new dogleg is a bit messy for my obsessive personality. Almost such that I suspect it will catch road grime and salt. A few people on TS recommend filling the curve by the step with fiberglass to stop gunk from getting up in there. Might try that, we'll see.
Also, was less than thrilled when the right side marker, front markers, and right tail light assembly wouldn't work. Turned out to be just a bad fuse, I suspect it popped when they disconnected, and subsequently broke, the spade connector to the rear right marker. Will fix that tomorrow.
For now, bus is washed, new antenna is also installed.
Pics tomorrow when it's light out.
Re: Home away from Home, on wheels.
Posted: Mon Dec 24, 2012 6:59 pm
by Brown
ObnoxiousBlue wrote:Got the call around noon, "You're done"
Picked the bus up by 1. Got it home, looking good. Happy with the corner and the side. Though not completely thrilled with the job on the dogleg. It looks fantastic, color match is dead on. But the backside of the new dogleg is a bit messy for my obsessive personality. Almost such that I suspect it will catch road grime and salt. A few people on TS recommend filling the curve by the step with fiberglass to stop gunk from getting up in there. Might try that, we'll see.
Also, was less than thrilled when the right side marker, front markers, and right tail light assembly wouldn't work. Turned out to be just a bad fuse, I suspect it popped when they disconnected, and subsequently broke, the spade connector to the rear right marker. Will fix that tomorrow.
For now, bus is washed, new antenna is also installed.
Pics tomorrow when it's light out.
Early Christmas present! Nice!

Re: Home away from Home, on wheels.
Posted: Mon Dec 24, 2012 10:30 pm
by Raj
Looking fwd to seeing the end product. Perhaps some seam sealer in this opening you speak of?
Re: Home away from Home, on wheels.
Posted: Tue Dec 25, 2012 10:32 am
by ObnoxiousBlue
Raj, where locally can i buy seam sealer? is there one brand or application procedure you suggest?
Has anyone seen the repop bumpers for the late bays? I'm contemplating having my bumpers powdered later this week, it's time as they look like they've been through hell. Krylon looks great when it's fresh, but the Roos and bumper guards just don't hold up to the sandblasting and pebbles on the road. Point is, my rear bumper has more waves than the Atlantic and I'm not sure if its worth losing the heavier gauge original for a thin but straight reproduction.
Projects for the next month:
Re-undercoating the front and patches just done
Seam sealer in the corners of the battery tray and dogleg
Powdercoating bumpers, Roo, overriders and wheels
New Hankook load rated tires 195/75/R14 "C" tires
New Koni adjustable oil-filled shocks on all 4 corners
New Brazilian Kombi mirrors
New impact strips, and side step
Considering attempting a front seat recover with the plaid kit from BusDepot
Also contemplating upgrading my steering wheel to the new style which is padded and less "sticky"
Re: Home away from Home, on wheels.
Posted: Tue Dec 25, 2012 1:05 pm
by ObnoxiousBlue
Can someone explain tires please... I've been reading page after page on TS, and frankly these guys each throw out number after number, contradicting each other and confusing me more.
I had noticed a few weeks ago, that there s a "wave" in my bus's side wall. I'm told this is likely because its on car tires, not reinforced tires. I've known this to be true, but never worried because it didn't really have any apparent effect and didnt seem to take away from the bus. They have somewhere near 50k on them, and have plenty of tread left.
The manual,

Calls for 185/75/R14, BusDepot sells Hankooks which I know many people are using. I'm disappointed because these are not white walls, and I refuse to run PortOWalls, but it is what it is.
Now, someone on TS says:
Wildthings wrote:obnoxiousblue wrote:I thought the manual calls for 185 r 14?
Almost all US spec buses came with reinforced 4 ply rated CAR TIRES from the factory. Early ones had 185r14 reinforced car tires and later ones had 205/70R14 reinforced car tires. Most US buses have a 2800# axle rating which is safely met by a pair of car tires with a 96 Load Index (1565# x 0.91 = 1424#).
Well, that threw a wrench in the wheel. I'm confused again. Just when I thought I had this coming together. He is using each/late as a differentiation. But my year manual says otherwise.
Tom, what are you running?
Re: Home away from Home, on wheels.
Posted: Tue Dec 25, 2012 2:52 pm
by Big_kid
That wave is likely normal, and found on many tires. I can't say 100% without actually seeing it, but it is very common. Read the MFR sticker (if you can still read it) and make sure whatever tires you consider are rated to handle the weight of Peabody, you, passengers, a full tank, all your gear, etc. LT (light truck) tires will have a stiffer sidewall, but will have less body roll (if that's an issue). On my Astro they made a HUGE difference in how it handled. I went from driving a sponge to driving something that actually felt decent.
I'd say keep these factors in mind, visit tirerack.com & elsewhere, shop around until you find something you like that suits your needs.
Re: Home away from Home, on wheels.
Posted: Tue Dec 25, 2012 3:15 pm
by ObnoxiousBlue
I checked and my tires are 185/75/R14's but the load rating is wrong, and they're not "C" class or "LT" class tires. I've known them to be wrong since I bought the bus.
Re: Home away from Home, on wheels.
Posted: Tue Dec 25, 2012 8:27 pm
by ObnoxiousBlue
Just dropping this link here, so I remember to do this later...
http://itinerant-air-cooled.com/viewtop ... 53#p186753
Re: Home away from Home, on wheels.
Posted: Wed Dec 26, 2012 6:57 am
by Tom
I'm running 185/65/R14 's Hankooks.
Re: Home away from Home, on wheels.
Posted: Wed Dec 26, 2012 3:41 pm
by Raj
ObnoxiousBlue wrote:Raj, where locally can i buy seam sealer? is there one brand or application procedure you suggest?
i'll revert with what I have , but I thinnk I have some brush on Eastwood stuff. I have a can for the 73 thing, but havent used it. Can you get to your spots with a brush or do you need a spray? I think the intention here is to fill the voids where metal panels meets metal panel...sealing out any dirt and moisture.
Re: Home away from Home, on wheels.
Posted: Thu Dec 27, 2012 9:33 pm
by ObnoxiousBlue
Still on the list to do
(Will be moved as I complete this winters tasks)
New speedo cable
New steering shaft coupling disc
Powdercoating wheels (silver)
Contemplating new trim rings, or no trim rings for refinished wheels
New Hankook 185/75/R14C tires
Powdercoating front and rear bumpers, Roo, and overriders
New rubber impact strips on refinished bumpers
New brakes (will probably farm out to GT)
New Koni Oil filled shocks front/rear
New Brazilian mirrors (ordered, but deferred from Bus Depot due to ~3wk back order)
Jack point step for side slider
Might do the front marker/turn signal mod
Re: Home away from Home, on wheels.
Posted: Sun Dec 30, 2012 6:19 pm
by ObnoxiousBlue
Rebuilt my EVAP canister today, I had a detailed step by step all typed up and my iPad locked up. I'll redo it later...
Also, new engine lid seal, exhaust on the BN4, new battery mat and clamp. Also installed new air handler/blower hoses and reinstalled a riser to accommodate the correct style hose. Lastly, put on new front window visors from JustKampers which I really like, but the fit is off by like 1/16th of an inch hich is just enough to bother me.
Re: Home away from Home, on wheels.
Posted: Mon Dec 31, 2012 8:45 pm
by ObnoxiousBlue
Sliding door has been a bit sluggish, it hasn't been popping out away from the body as energetically as it once had. I've been following the instructions on Itinerant VW, and got stuck today when I didn't have a gear puller. Though, apparently we do have one downin the basement so I'll get back in it tomorrow.
Got the track cover off, that was a project because some a$$hole painted the cover, and the beading on the bus. I'll be fixing that and putting in soft, new beading while its apart. The door is separated from the body at the slider hinge, but the rollers are still on. Hoping to get the mechanism stripped down tomorrow, then want to give it to my friends dad, who owns a metal plating shop. I'll have him acid bath all the parts so they're clean with no debris and chrome the slider's U bolt so I don't have to worry about the paint chipping onit anymore. I've seen early bay's with the chromed slider hook, not so much on the late bays. But it seems like a logical upgrade.


Re: Home away from Home, on wheels.
Posted: Tue Jan 01, 2013 9:32 am
by Tom
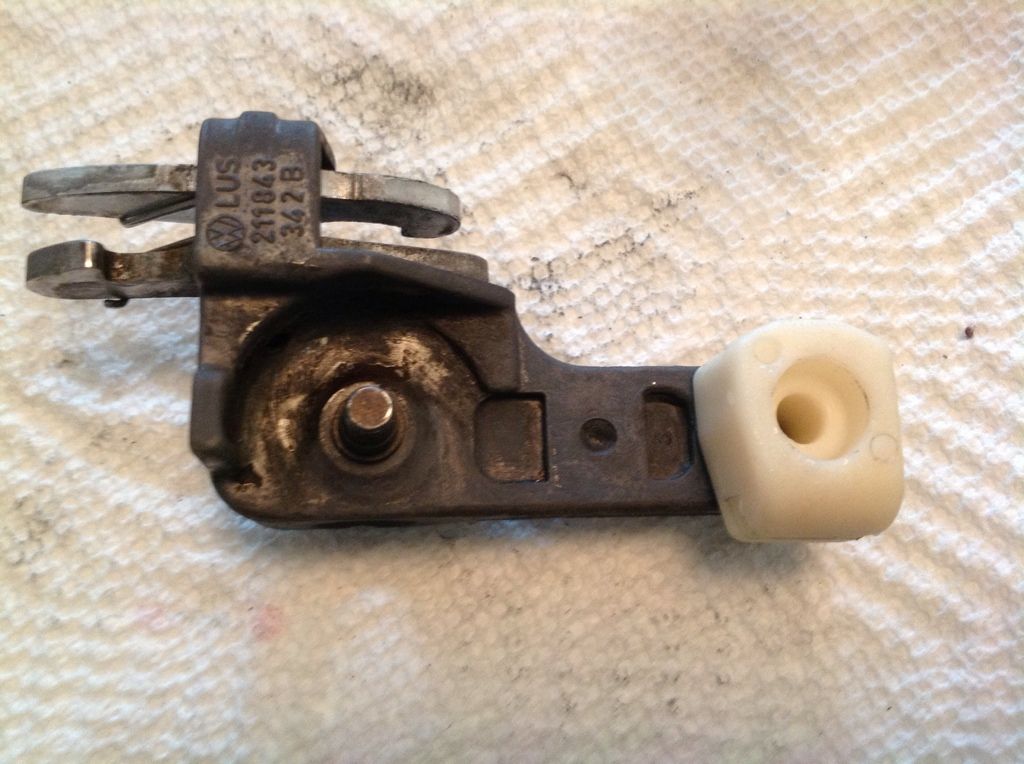
Funny that this has come up, my hinge (the part that bolts into the door) cracked and a piece is missing, I just bought a replacement off The Samba. Mike , did you remove the nylon block ?
Re: Home away from Home, on wheels.
Posted: Tue Jan 01, 2013 10:14 am
by ObnoxiousBlue
No, my block has been missing since I bought the bus, but honestly, it never affected the door. If it weren't for the fact that the door stopped "popping" out, I'd still be rolling without the block.
Re: Home away from Home, on wheels.
Posted: Tue Jan 01, 2013 11:43 am
by Tom
The block is only $4 from Busdepot, I'm sure they wouldn't have added it to the design if it wasn't necessary.The block stops the hinge from pivoting back and forth.
Re: Home away from Home, on wheels.
Posted: Tue Jan 01, 2013 1:00 pm
by ObnoxiousBlue
I have the block, and I know what it does. But in the time I've owned the bus it's been missing. I never opted to put it on because the track cover was painted in place and I didn't want to damage the paint. As the adage goes "if it ain't broke, don't fix it."
Well, now after getting gummed up with paint when the body shop painted the roller arm it was time to give the slider some attention.
I've been following the step by step, and the guys on TS have been very helpful.
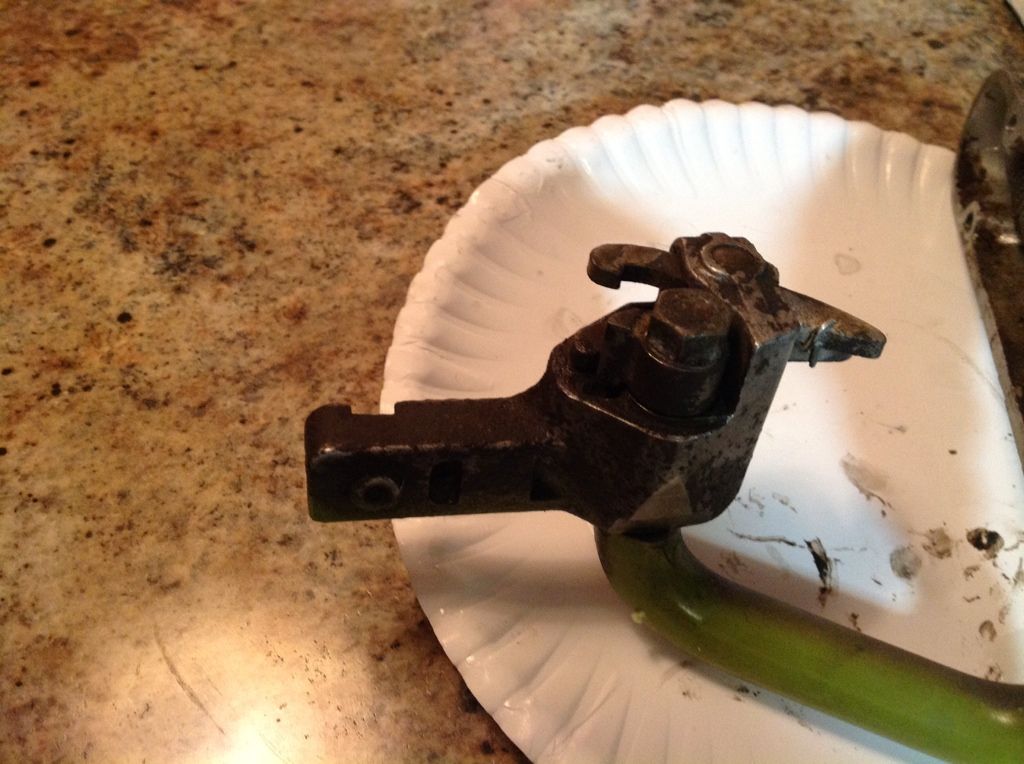
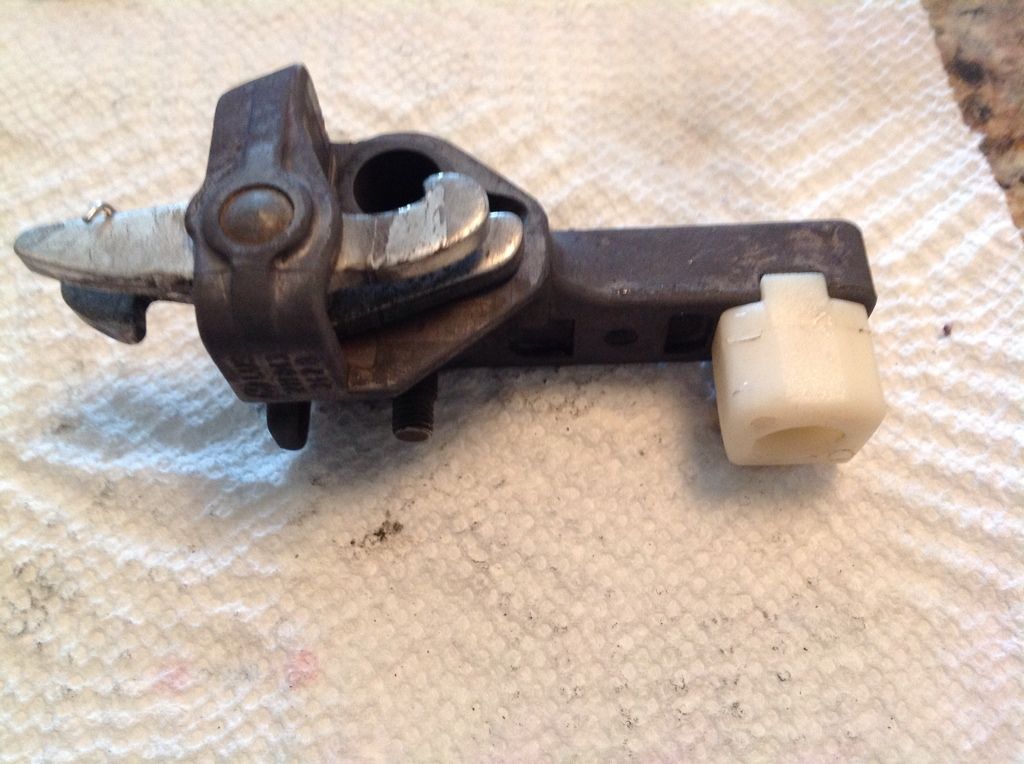
I used a gear puller to get the bearing off of the roller body
Then, I released the spring and removed the "door side" of the assembly.
With that off, I used a 13mm to remove the nut that holds the check in place, and slid that, along with the roller body off of the U bracket. I took some pictures so I can orient the check back in the same position.
With the three main pieces broken apart I'm now soaking the parts (minus the roller bearing) in some Purple Power degreaser. I had tried using simple green but that shit was doing NADA. So I'll let the parts soak for an hour or so then try to break the old nasty grease off.
I'm going to give the U arm to my friends dad to chrome, hope to have that back by late week so I can reassemble everything before I forget how it came apart!

Pics later when the parts are all clean.
Re: Home away from Home, on wheels.
Posted: Tue Jan 01, 2013 3:05 pm
by ObnoxiousBlue
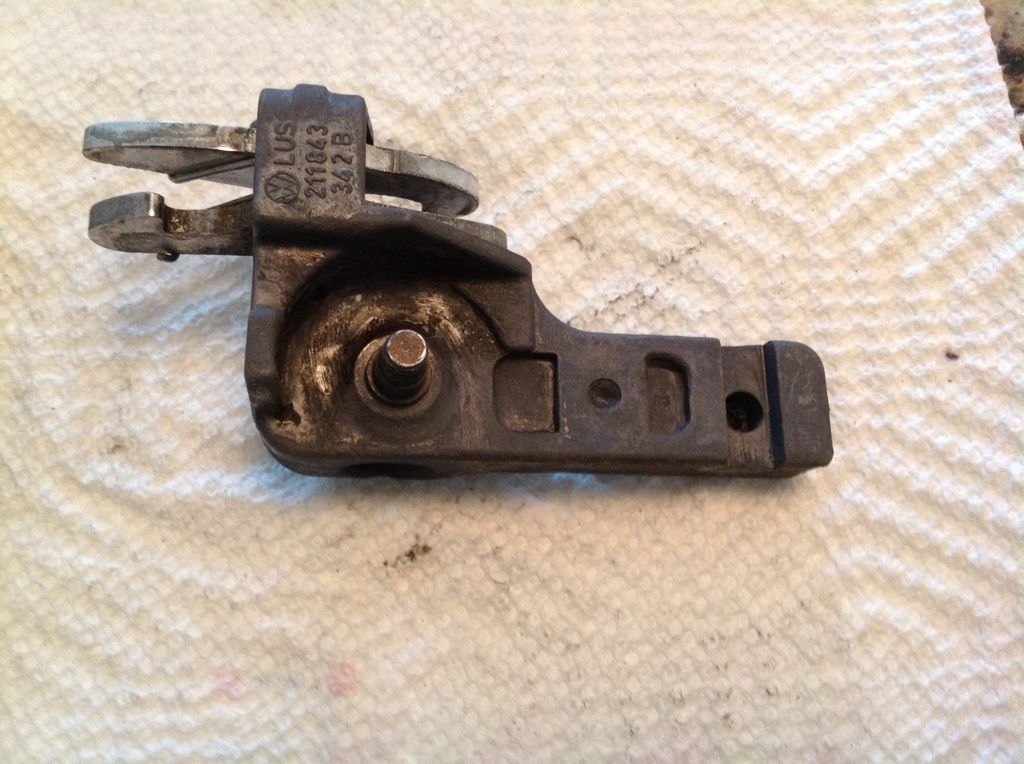
I've got all the parts cleaned. The bearing is soaking in some motor oil and I'm looking at the slider assembly. I've noticed that one of the "spring loaded arms" isn't moving freely like the other.
Here is a video so you can see what I'm saying:
http://i256.photobucket.com/albums/hh18 ... BE7590.mp4
Is this likely the source of my original issue (maybe why the door wasnt popping off the body?)
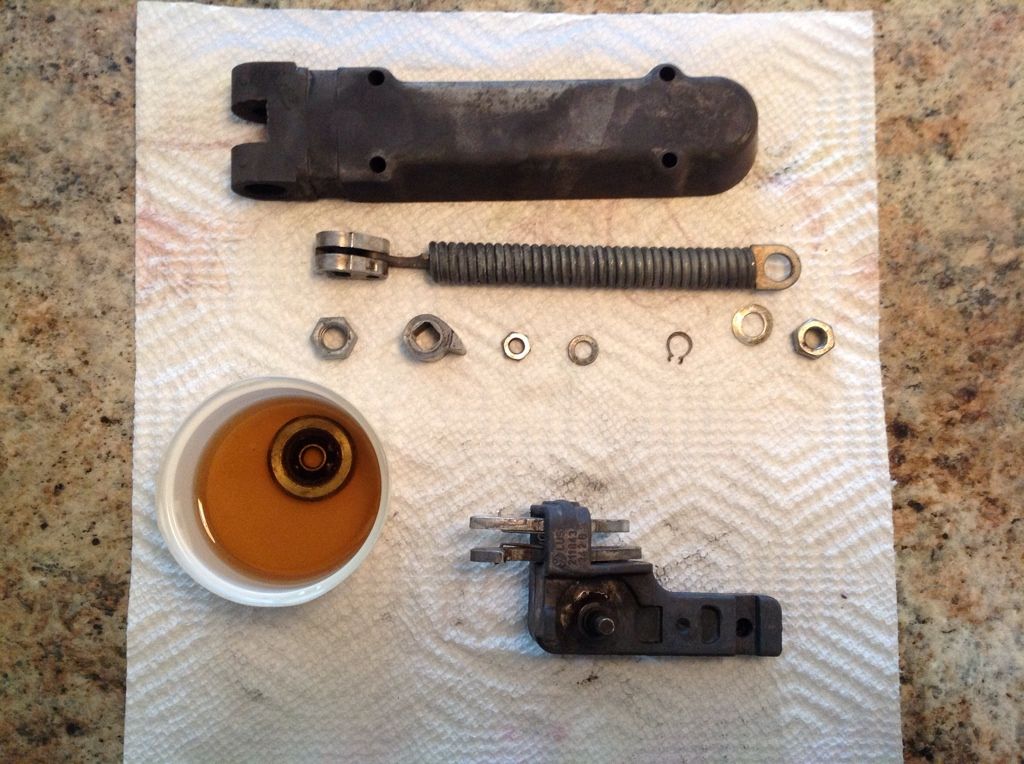
Here's my pile o' parts... Wasn't as hard to get apart as I thought, the bearing and gear puller did test my patience though.
I drilled out the old rivet, and test fit the plastic guide bushing...
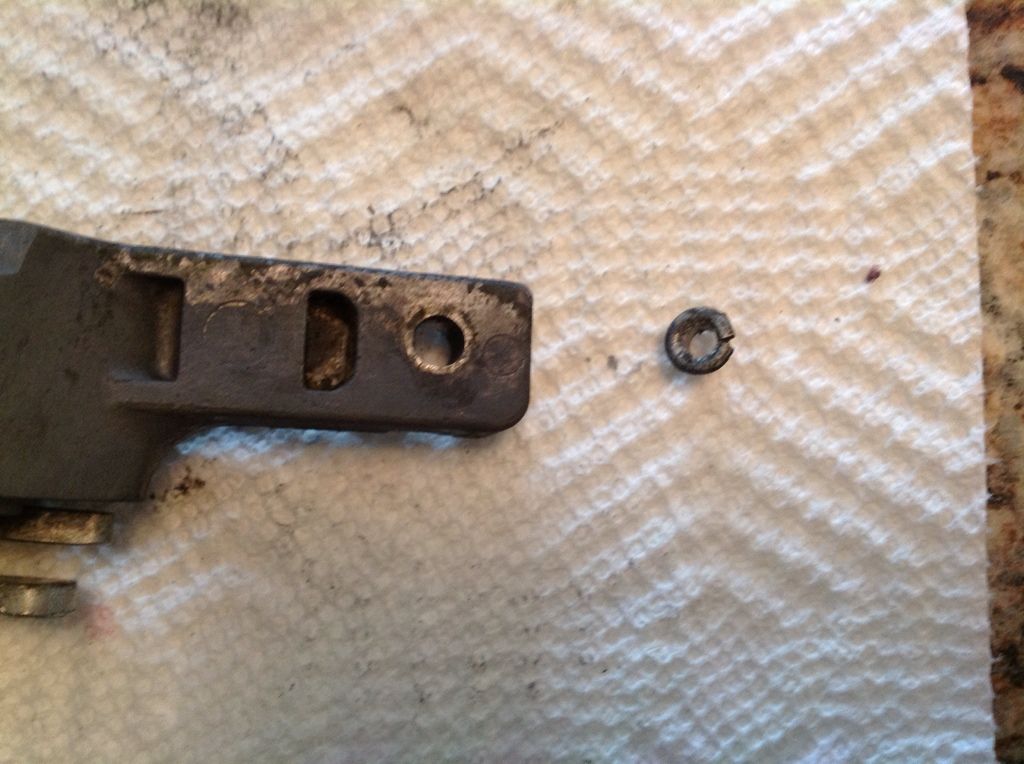
I'm going to use some metal polish on the surfaces that are exposed when the door is open.
Re: Home away from Home, on wheels.
Posted: Tue Jan 01, 2013 4:55 pm
by Tom
Did you buy the new beading for the cover ? Mine cracked when I pulled it off.
P.S. wasn't trying to be "preachy" just thought you were going to leave the part out.
Re: Home away from Home, on wheels.
Posted: Tue Jan 01, 2013 5:25 pm
by ObnoxiousBlue
I have to order new beading tomorrow, I just took everything apart yesterday, and obviously BusDepot is closed lol.
I'm bringing the arm to be chromed tomorrow. That will take a day or two. I'm going to show him the door bracket and the roller assembly too, he thinks he might be able to give them a quick acid dip to at least take the staining off of them. The grease is all off them, but they have some discoloration. It doesn't matter much because no one will ever see them, but I'm not taking this apart again lol.
Then, once I have the pieces all back I'll use some gasoline to clean the track reassemble it all, and send the bus back to have the cover reprinted and the area just behind the rear window from where the dirt and sand from within the beading scratched the body.
I didn't think you were preachy, I just wasn't going to dig into the door to make a repair to a condition that wasn't effecting the operation of the bus or door.
Re: Home away from Home, on wheels.
Posted: Tue Jan 01, 2013 8:08 pm
by ObnoxiousBlue
Just responded to someone who wants to use the bus in their wedding, on 7/27/13.
That's the day the bus was built! (But in 77)
We'll see if they're comfortable with my terms. The wedding is at the Jersey Shore, so this isn't gonna be no $250 job...
Re: Home away from Home, on wheels.
Posted: Wed Jan 02, 2013 10:23 pm
by ObnoxiousBlue
Slider hinge is off getting chromed, it should be back in a day or two.
Early baywindows had chrome sliders, late bays had painted. But, as I've already seen with my bus the paint takes a beating; especially when it's lathered in grease. Chrome will definitely hold up better. The slider assembly and door assembly will be acid dipped and then dipped in cadmium. I can't do them in chrome because the tripple plating of chrome will add too much thickness and will prohibit the springs from controlling the door, but cadmium is rust resistant and won't really add thickness where it matters.
Made arrangements today to send the bus to the body shop on Monday. I'll sand the old paint off the track first, they'll be painting under the cover, the cover itself, and touching up the D pillar above the beading and at the end of the track cover. There was apparently dirt which worked its way in between the beading and the body and as gentle as I was in removing the cover it still cracked the paint where the track and beading was painted on the body. That'll be done right this time in case the slider needs service again in the future.
The bottom roller will get cleaned out and regreased after this,mince that won't require any caroming, or paintwork.
Tomorrow, I'll be ordering the beading and a new rear passenger side window seal. Audrey, if you want to swing by we can tackle this one together so you know what to expect with your windscreen. I'm not a pro, but I've done windows on my 69 Bay, and on Reise... This flat window is a good start and its a good size.