Page 7 of 16
Re: my project 71
Posted: Sun Aug 28, 2016 7:51 am
by Big_kid
Looking good, as usual!
I've been banned from using Rustoleum by my buddy who painted the buggy.
Re: my project 71
Posted: Mon Aug 29, 2016 7:33 pm
by elrockk
ive had good luck with rustolyem in the past. i think alot of people are miss using POR its made to paint on rusted metal and alot of people are using it on new metal where it gets no Bite, i have a question is there a seal behind the crank pulley ,she starting to mark her spot after running a few minutes
Re: my project 71
Posted: Mon Aug 29, 2016 10:55 pm
by B MAN
your crank case breathing alright?
excessive pressure is sometimes the culprit in a leak behind the crank.
Re: my project 71
Posted: Tue Aug 30, 2016 6:54 am
by Raj
elrockk wrote: i have a question is there a seal behind the crank pulley
No seal behind the stock crack pulley. It uses a that concave washer ( not visible when engine is together) and mainly the force created form the spiral grooves on the pulley to keep the oil 'in'.
Re: my project 71
Posted: Tue Aug 30, 2016 5:18 pm
by elrockk
yeah i think i still have the breather taped closed from when i power washed it ill try that tomorrow. thanks guys
Re: my project 71
Posted: Sat Sep 03, 2016 7:04 pm
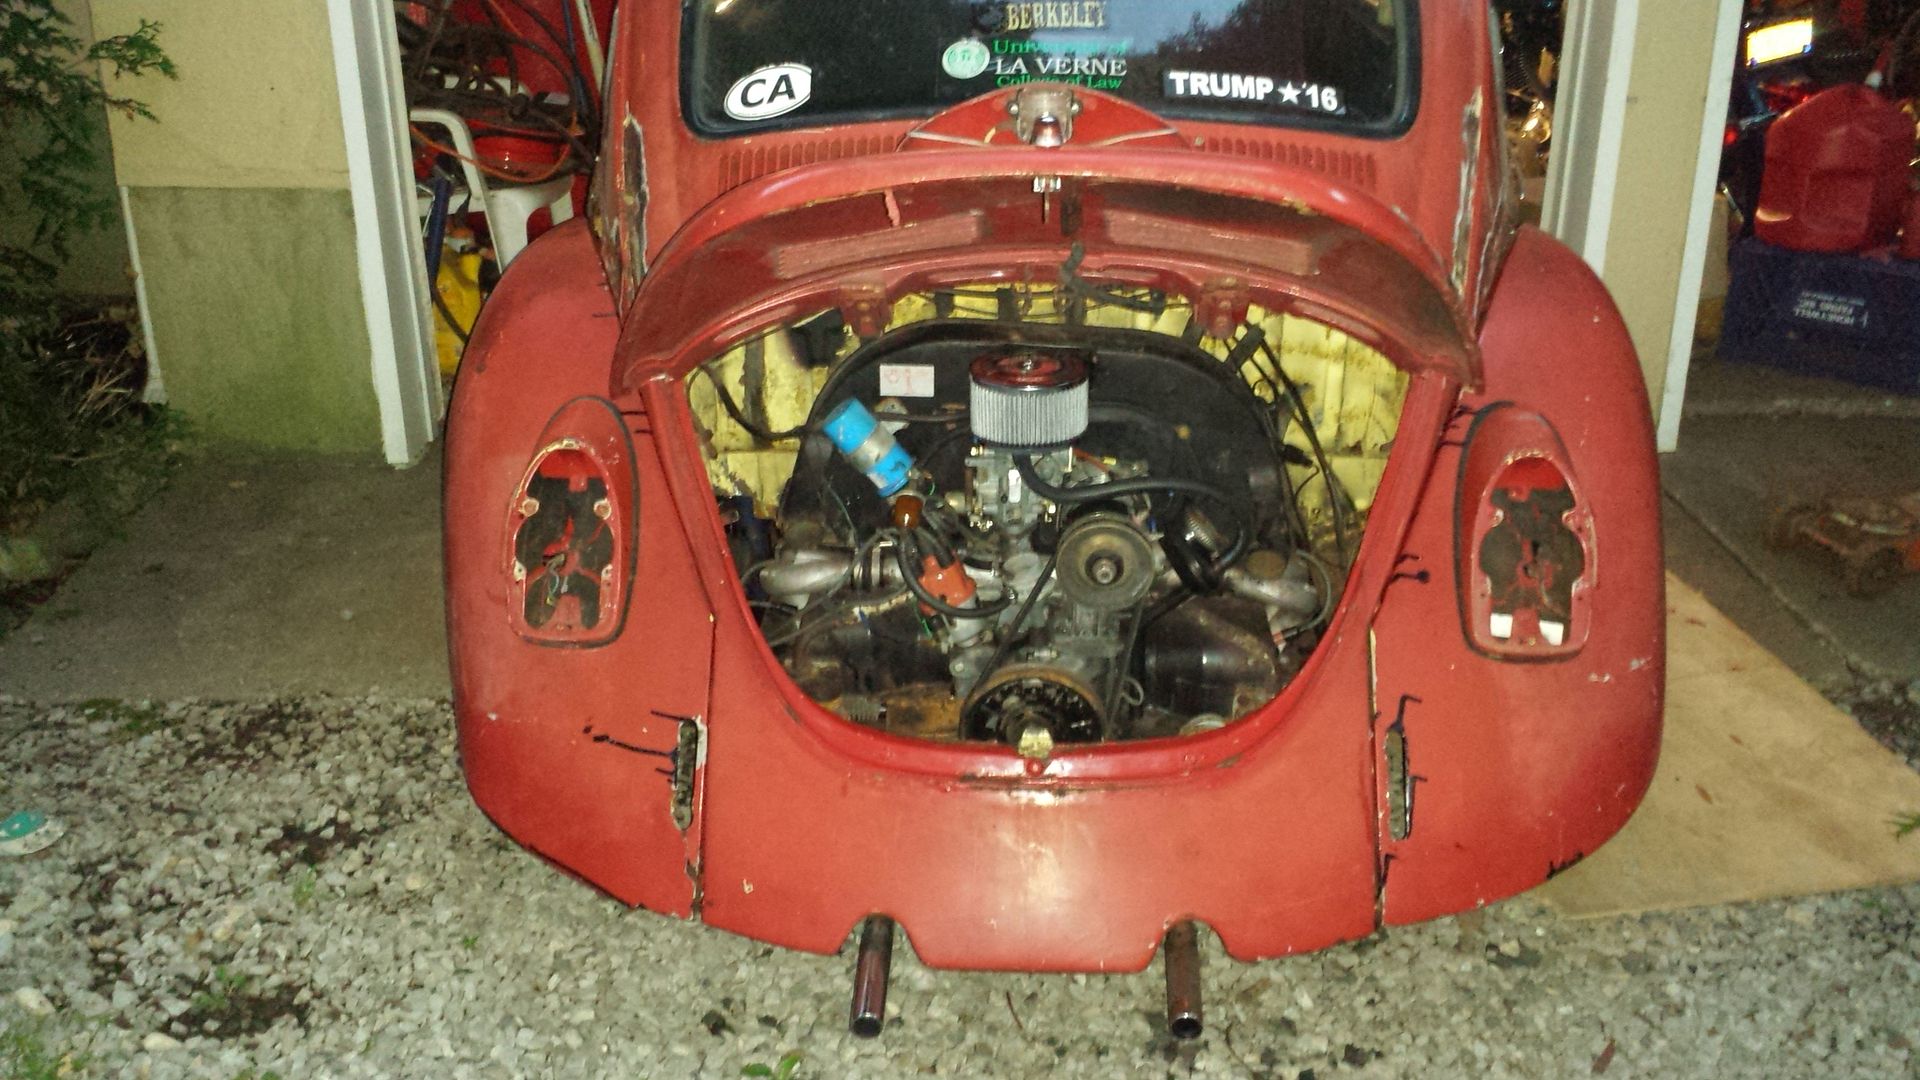
by elrockk
rigging fender for install
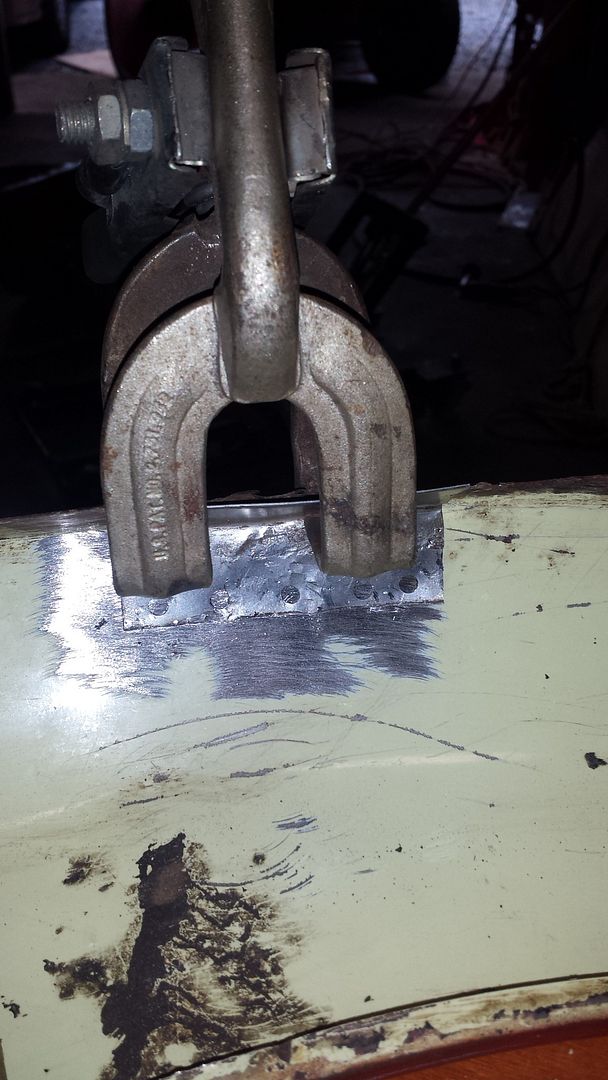
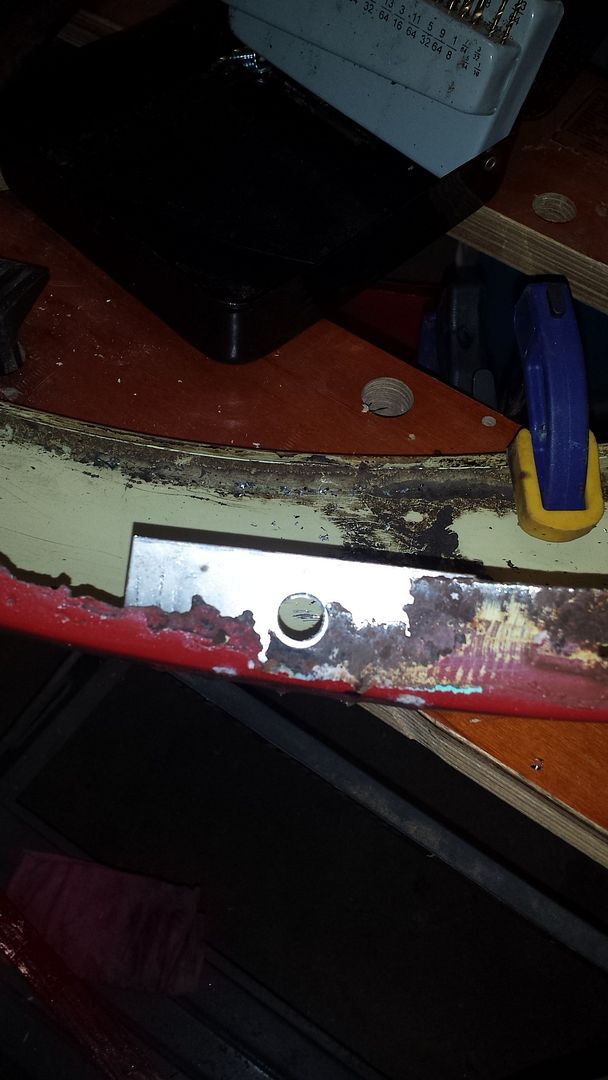
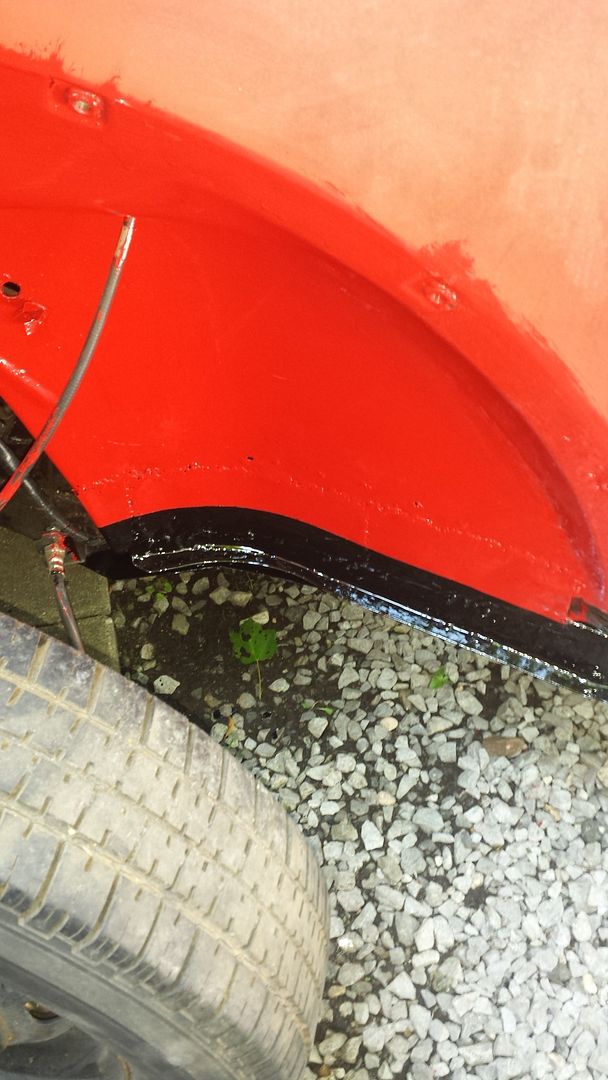
got a coat of rustolium on the inner fenders
and got the rear fenders on loose
Re: my project 71
Posted: Sat Sep 03, 2016 7:08 pm
by elrockk
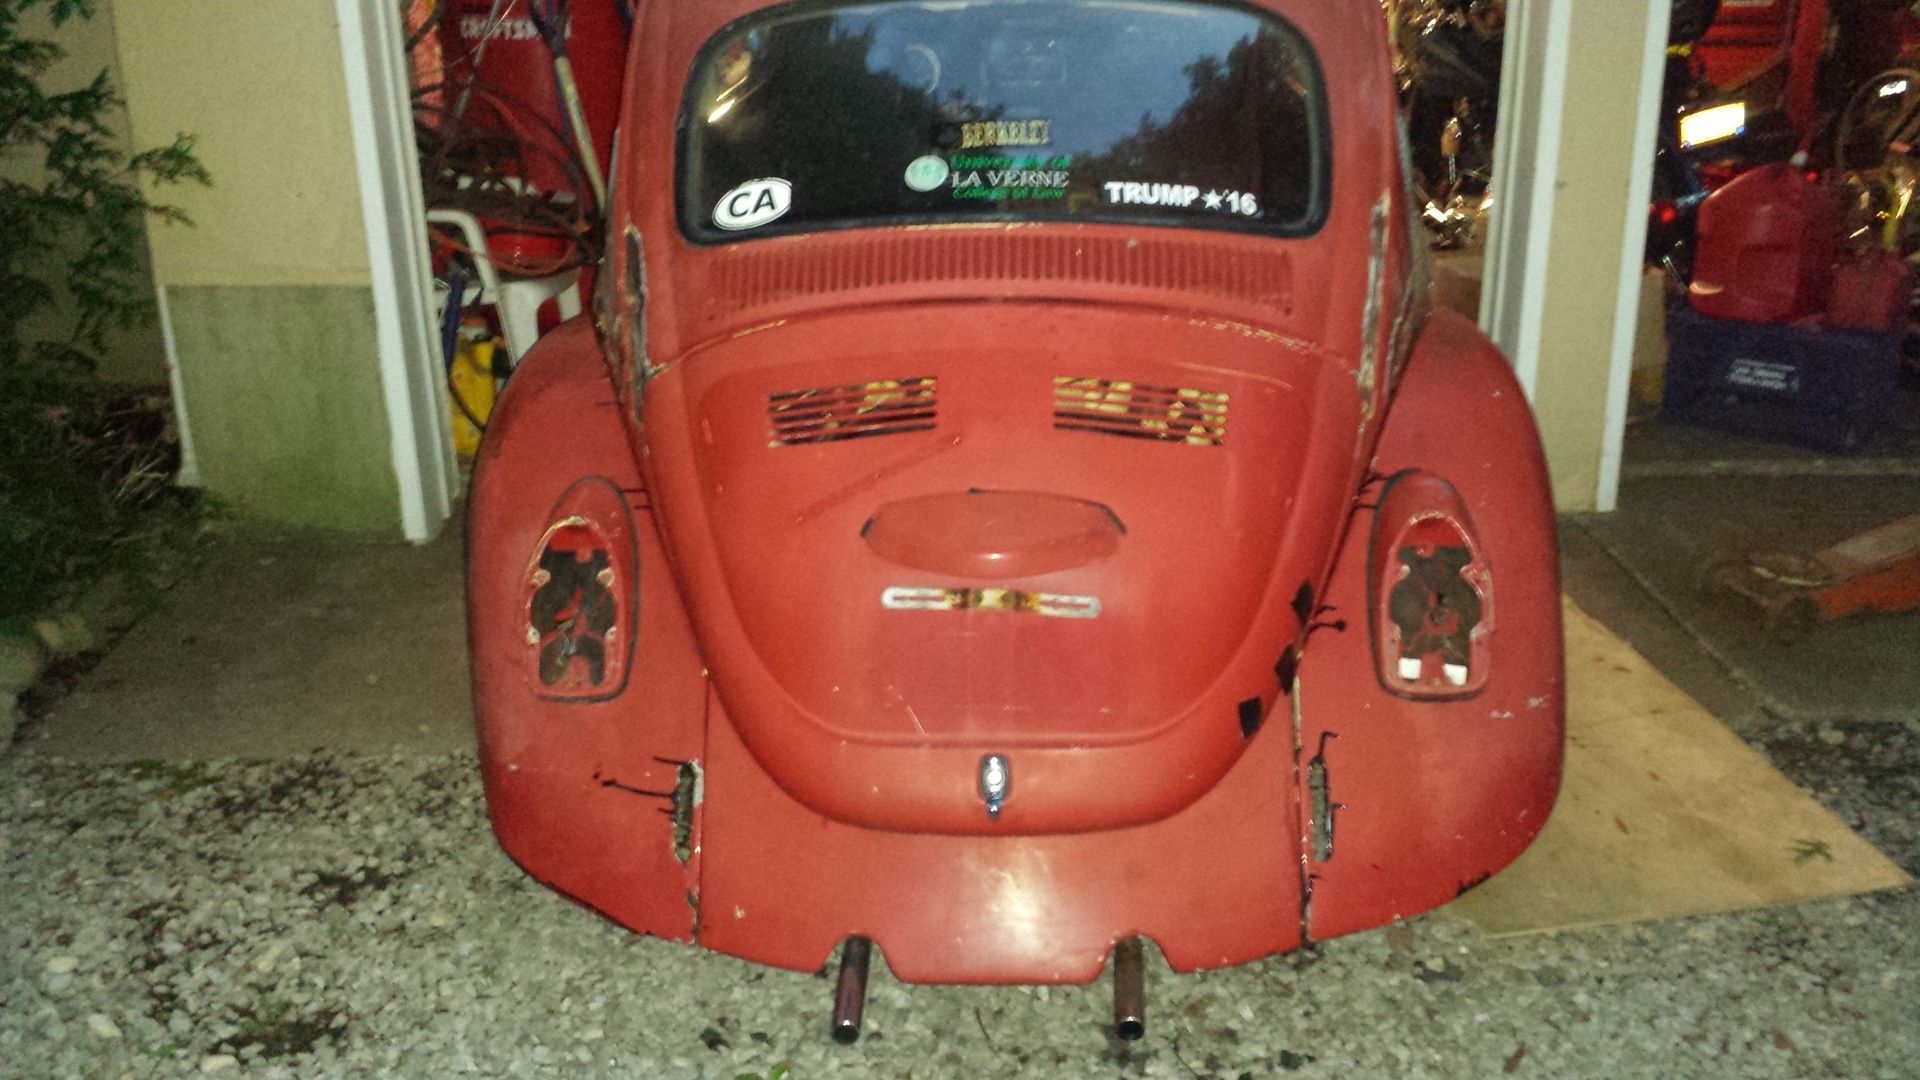
rear fenders on loose letting the beading unroll a bit tonight
gonna get front fenders on tomorrow
Re: my project 71
Posted: Sun Sep 04, 2016 8:56 am
by Big_kid
Kickin' it out! Good to see others making progress too!
Re: my project 71
Posted: Sun Sep 04, 2016 6:36 pm
by elrockk
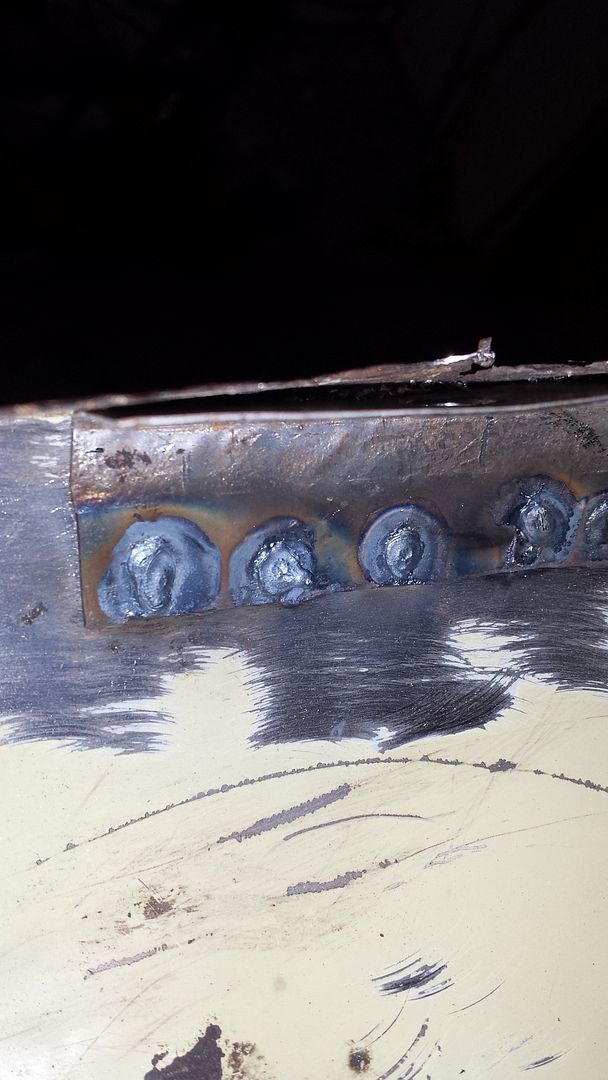
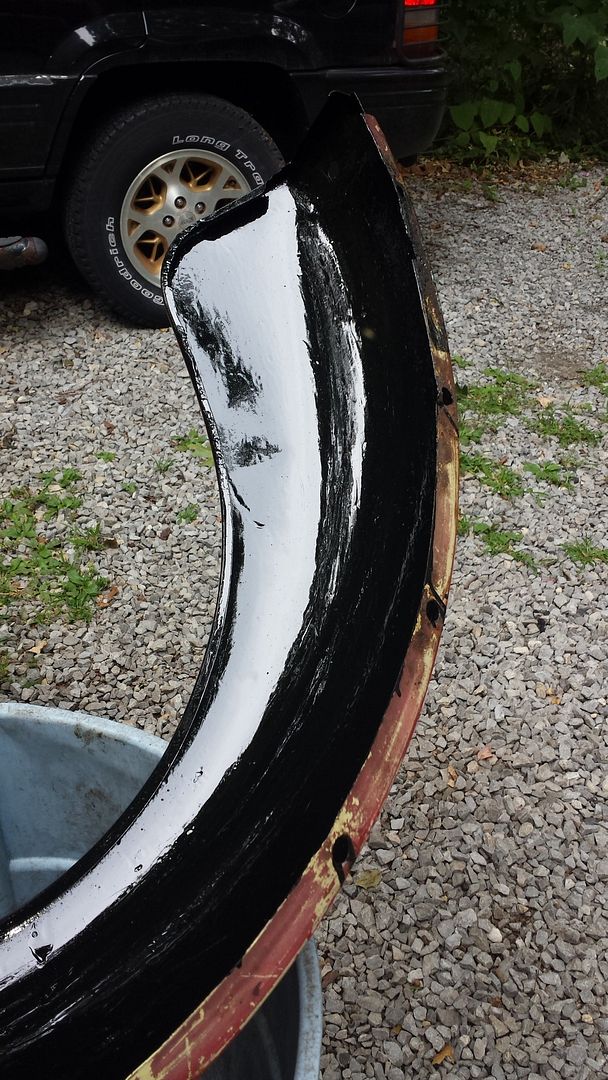
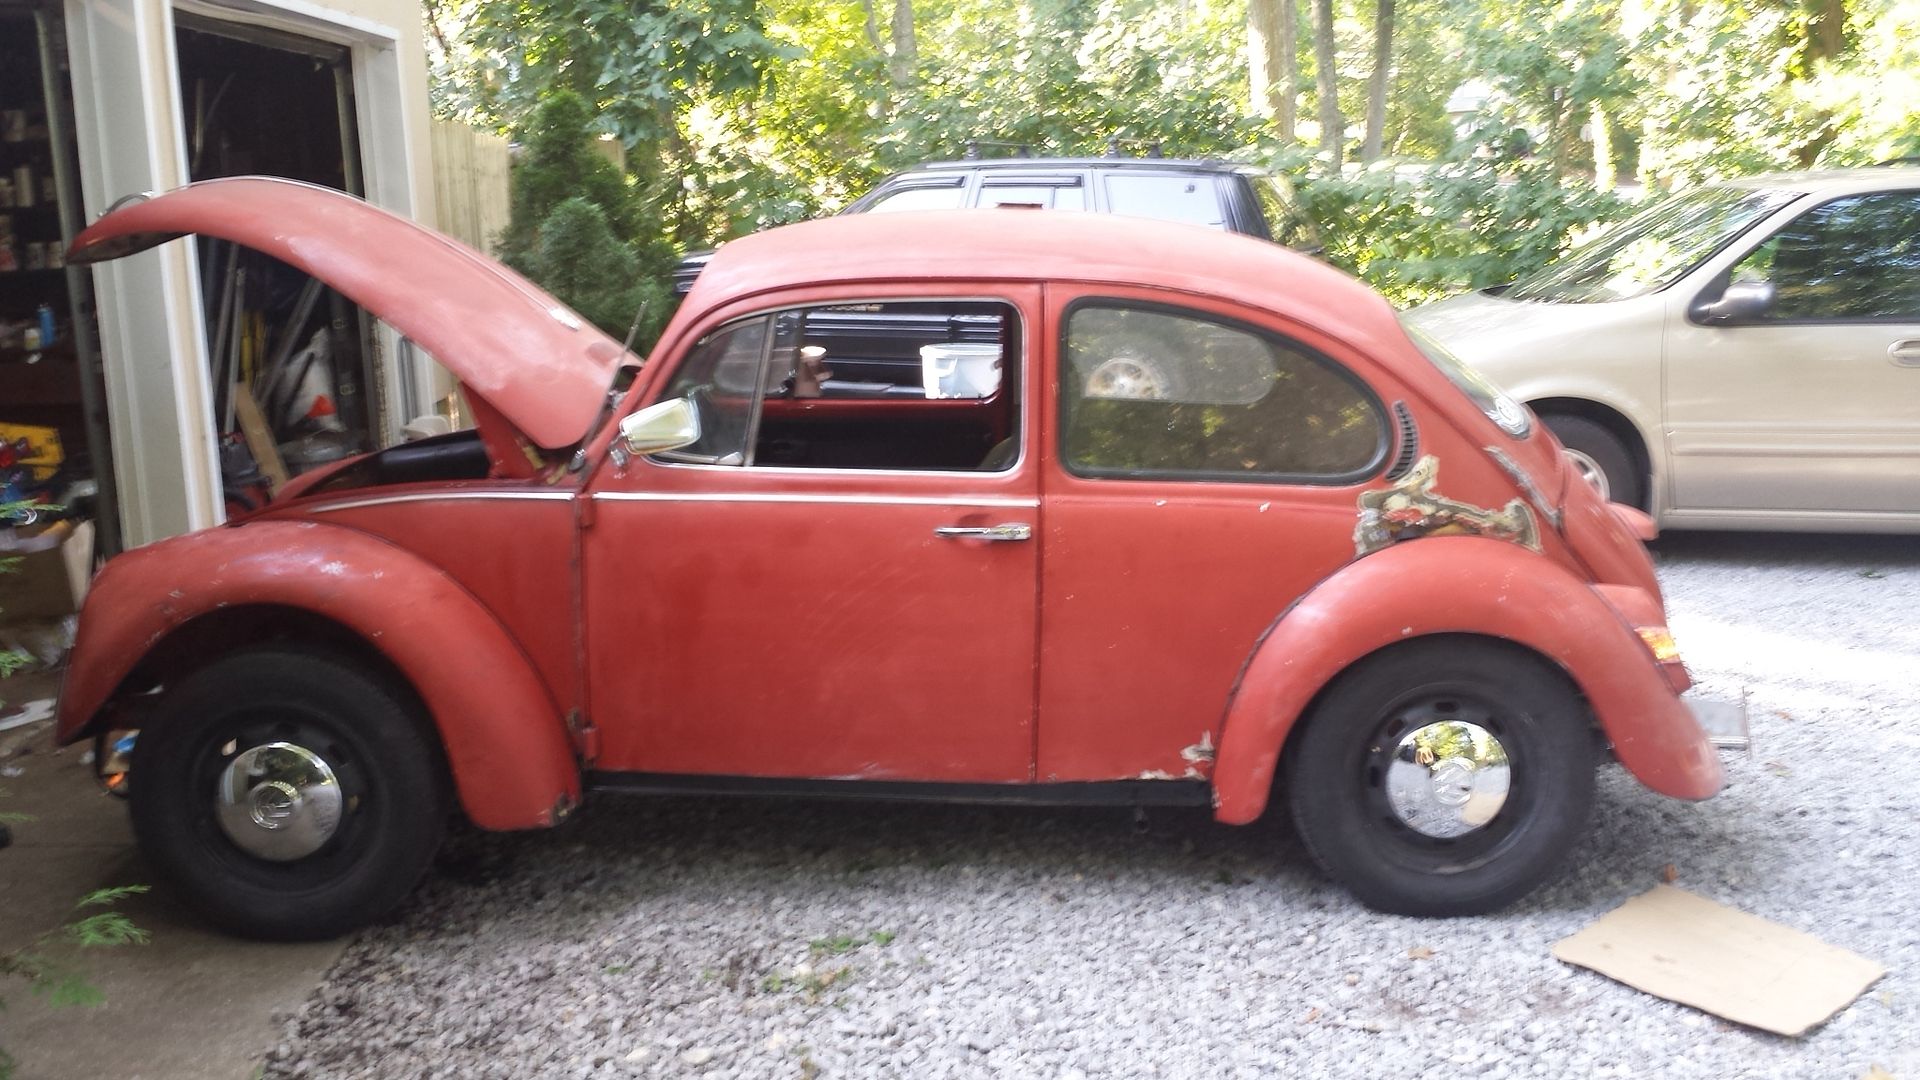
made a clean line in the paint to take the eye off my crappy welds
got front and rear fenders installed
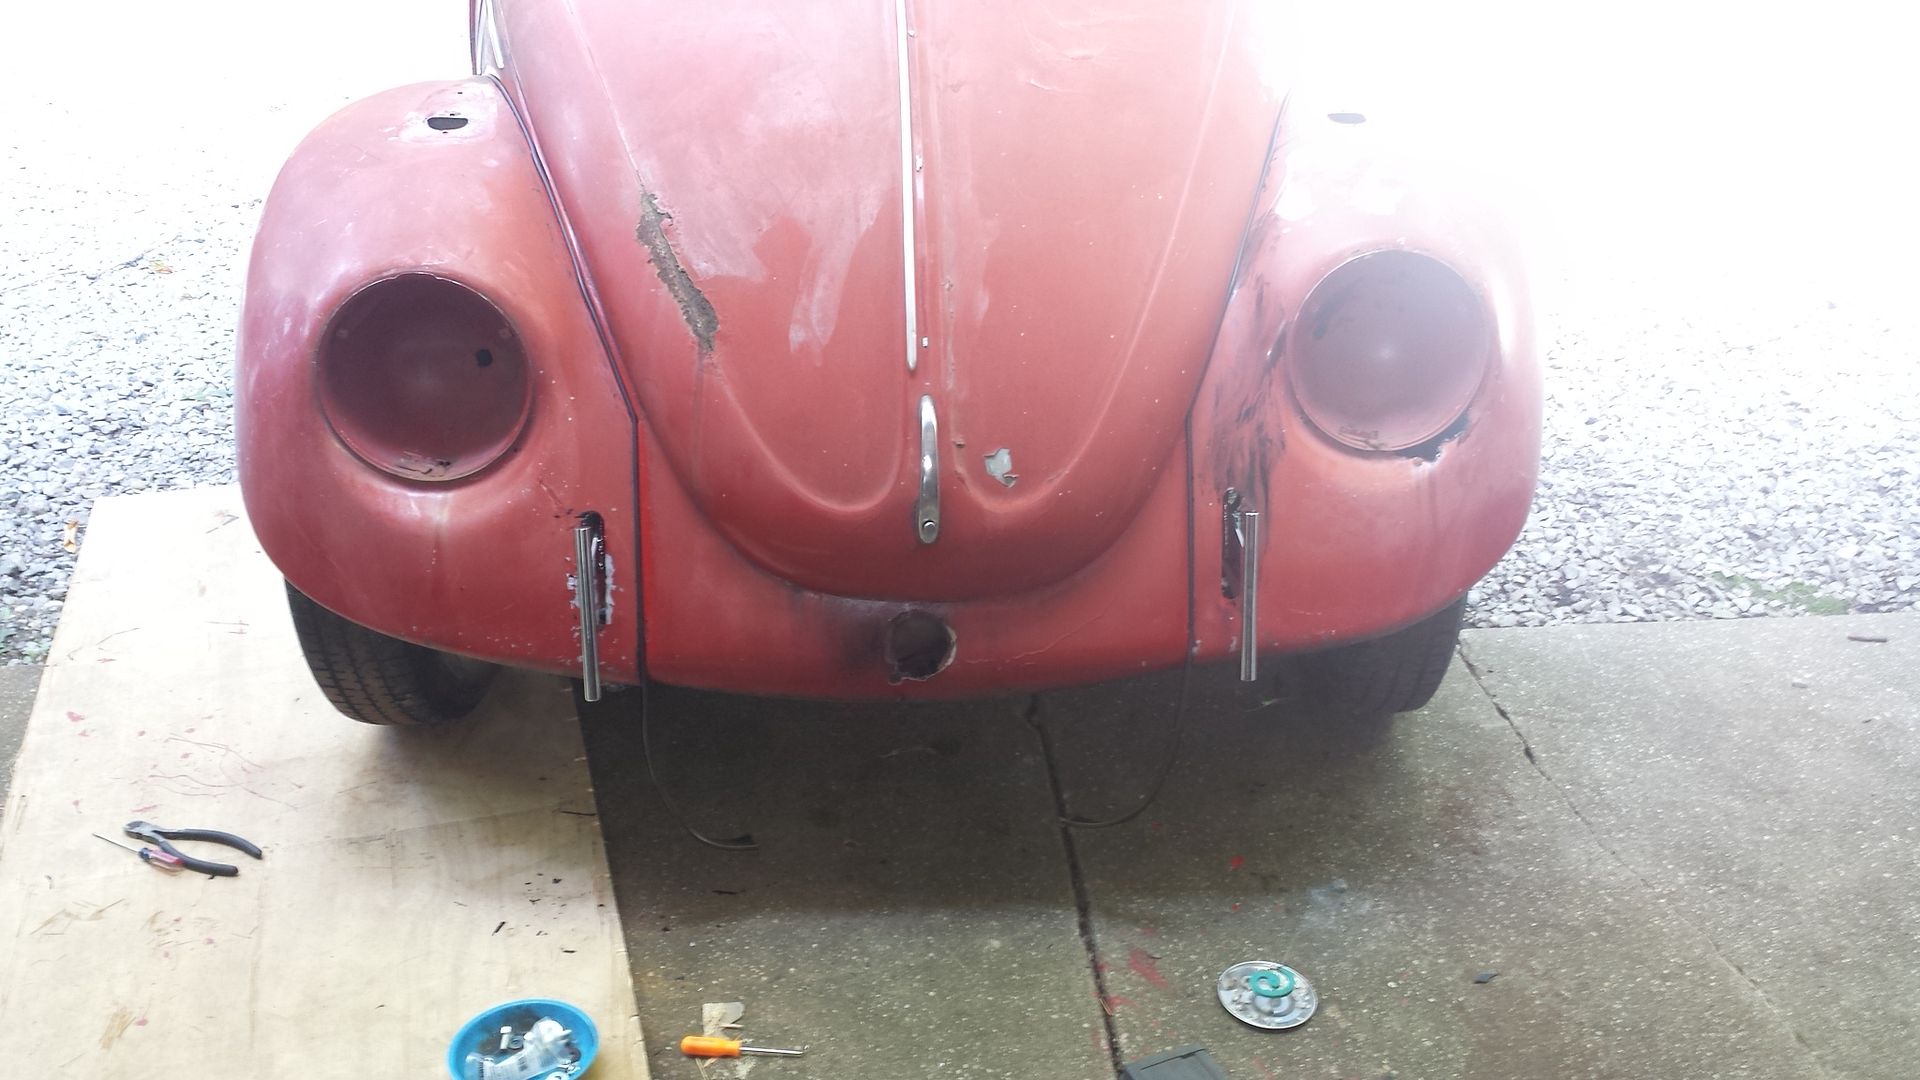
apparently ive got 2 different fenders in the front and 2 left side

turn signal lights
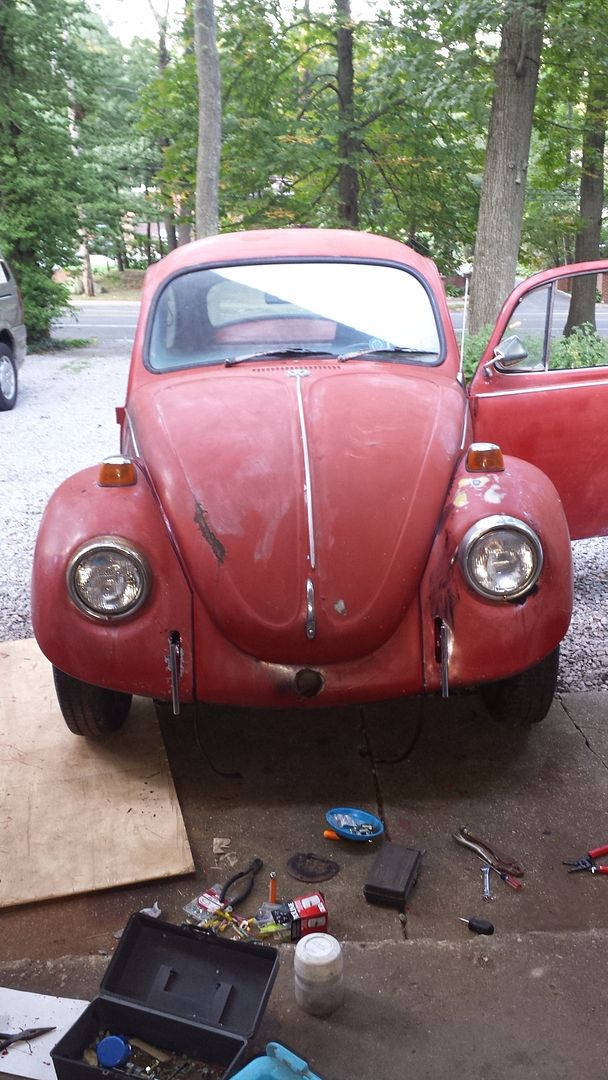
but i got all the lights installed and mini bumbers
Re: my project 71
Posted: Sun Sep 04, 2016 6:38 pm
by elrockk
and polished the hub caps
Re: my project 71
Posted: Tue Sep 06, 2016 8:07 am
by Raj
rockin and rollinl!
Re: my project 71
Posted: Wed Sep 07, 2016 6:36 pm
by elrockk
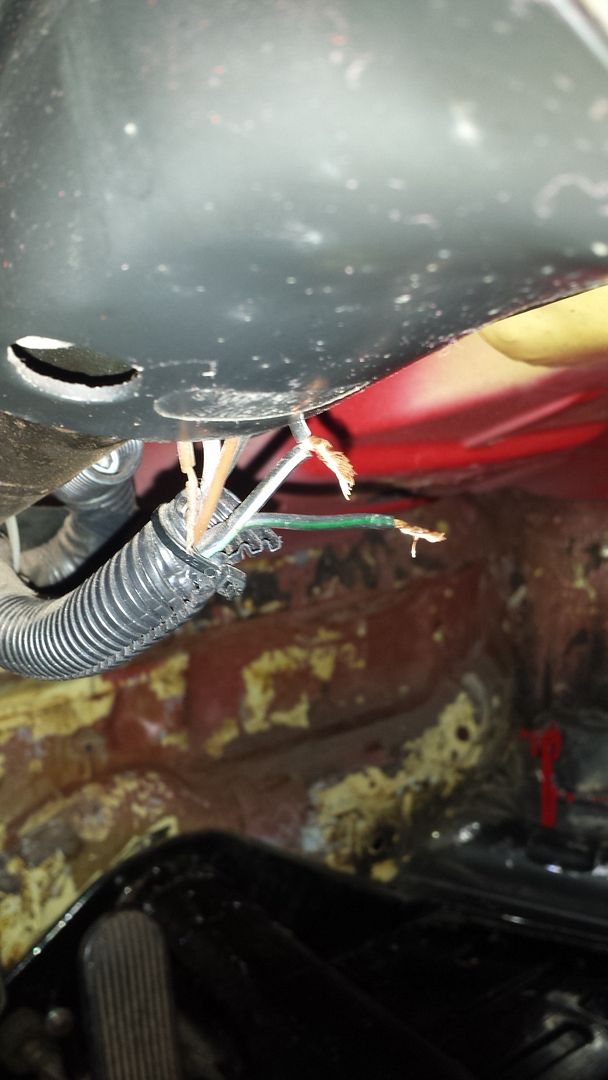
i have 2 questions matbe you guys can help
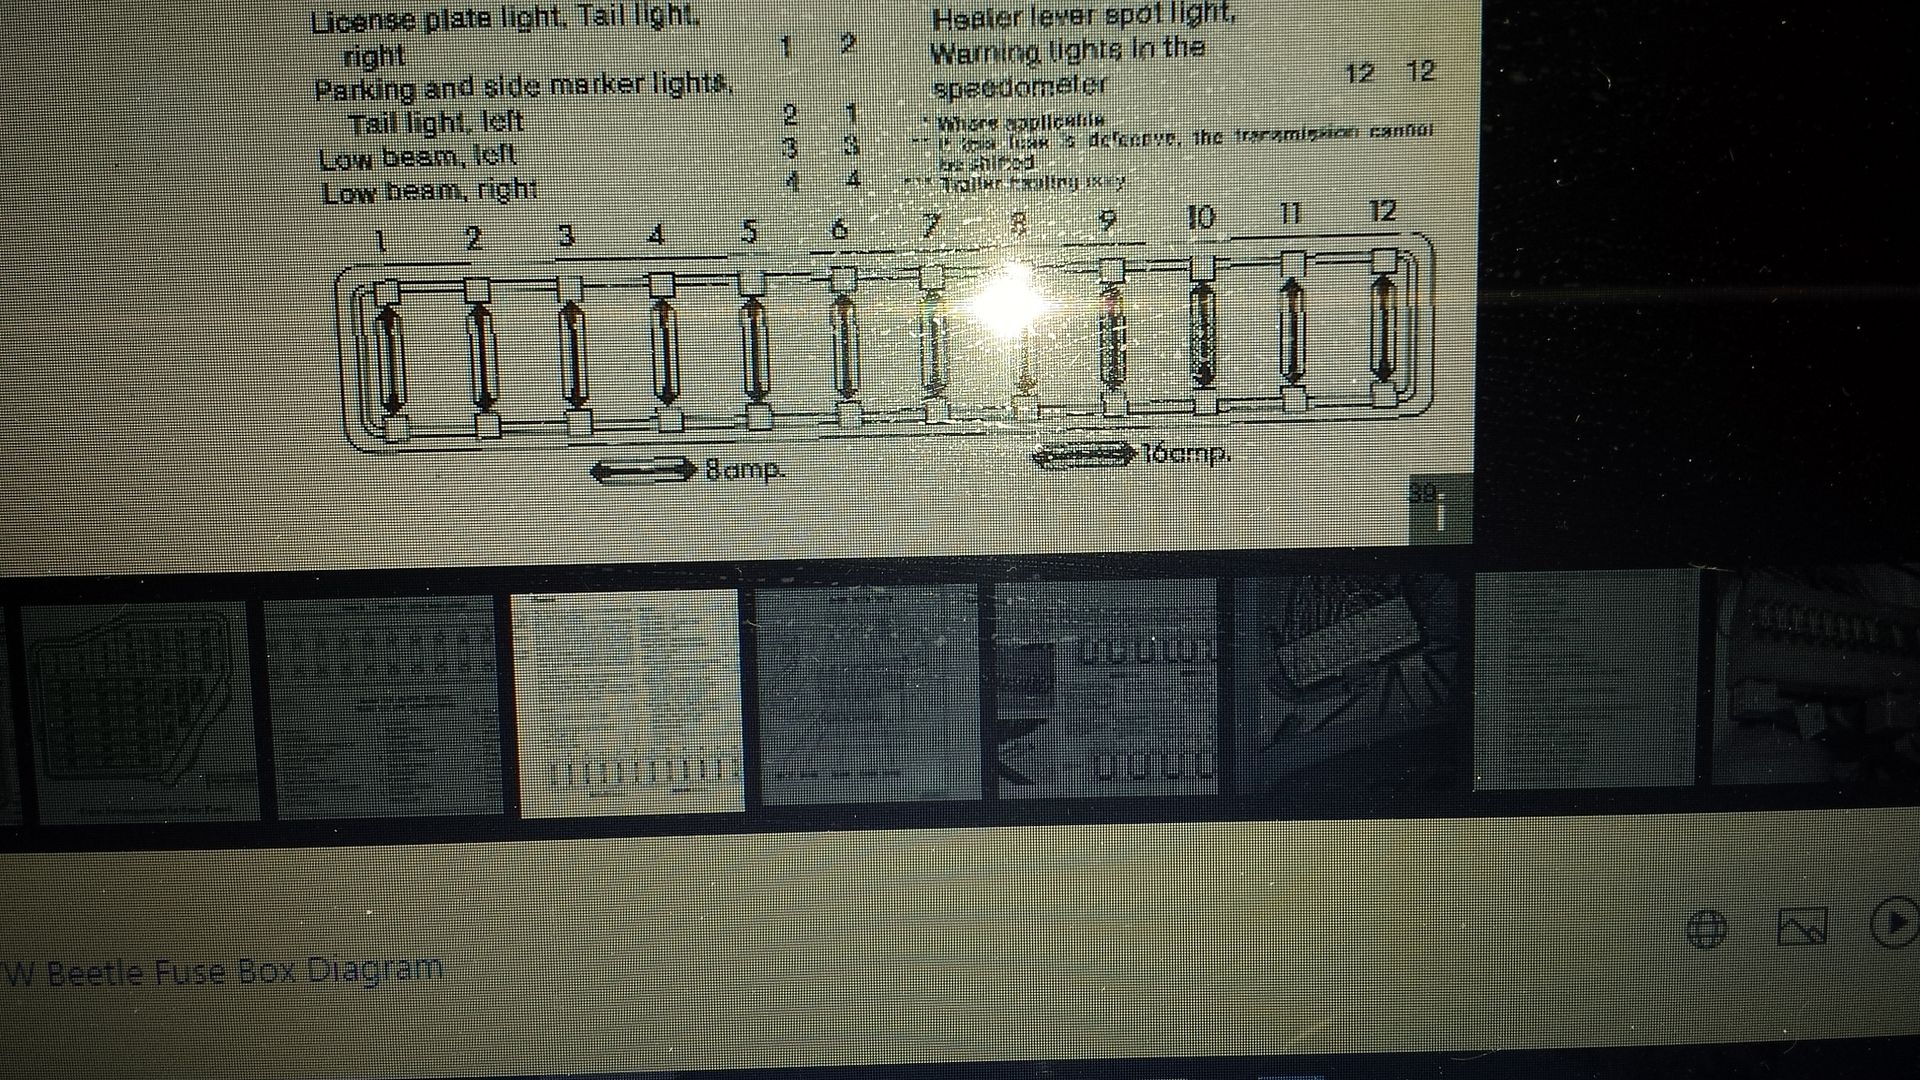
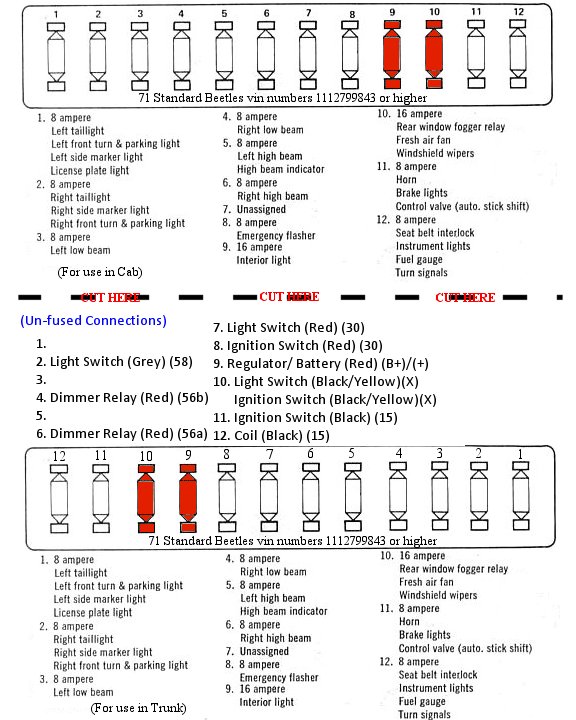
this is a picture of the fuse panel of a 1971 beetle i think 10 / 8 amp fuses and 2 / 16 in positions 9/10 this iswhat i got
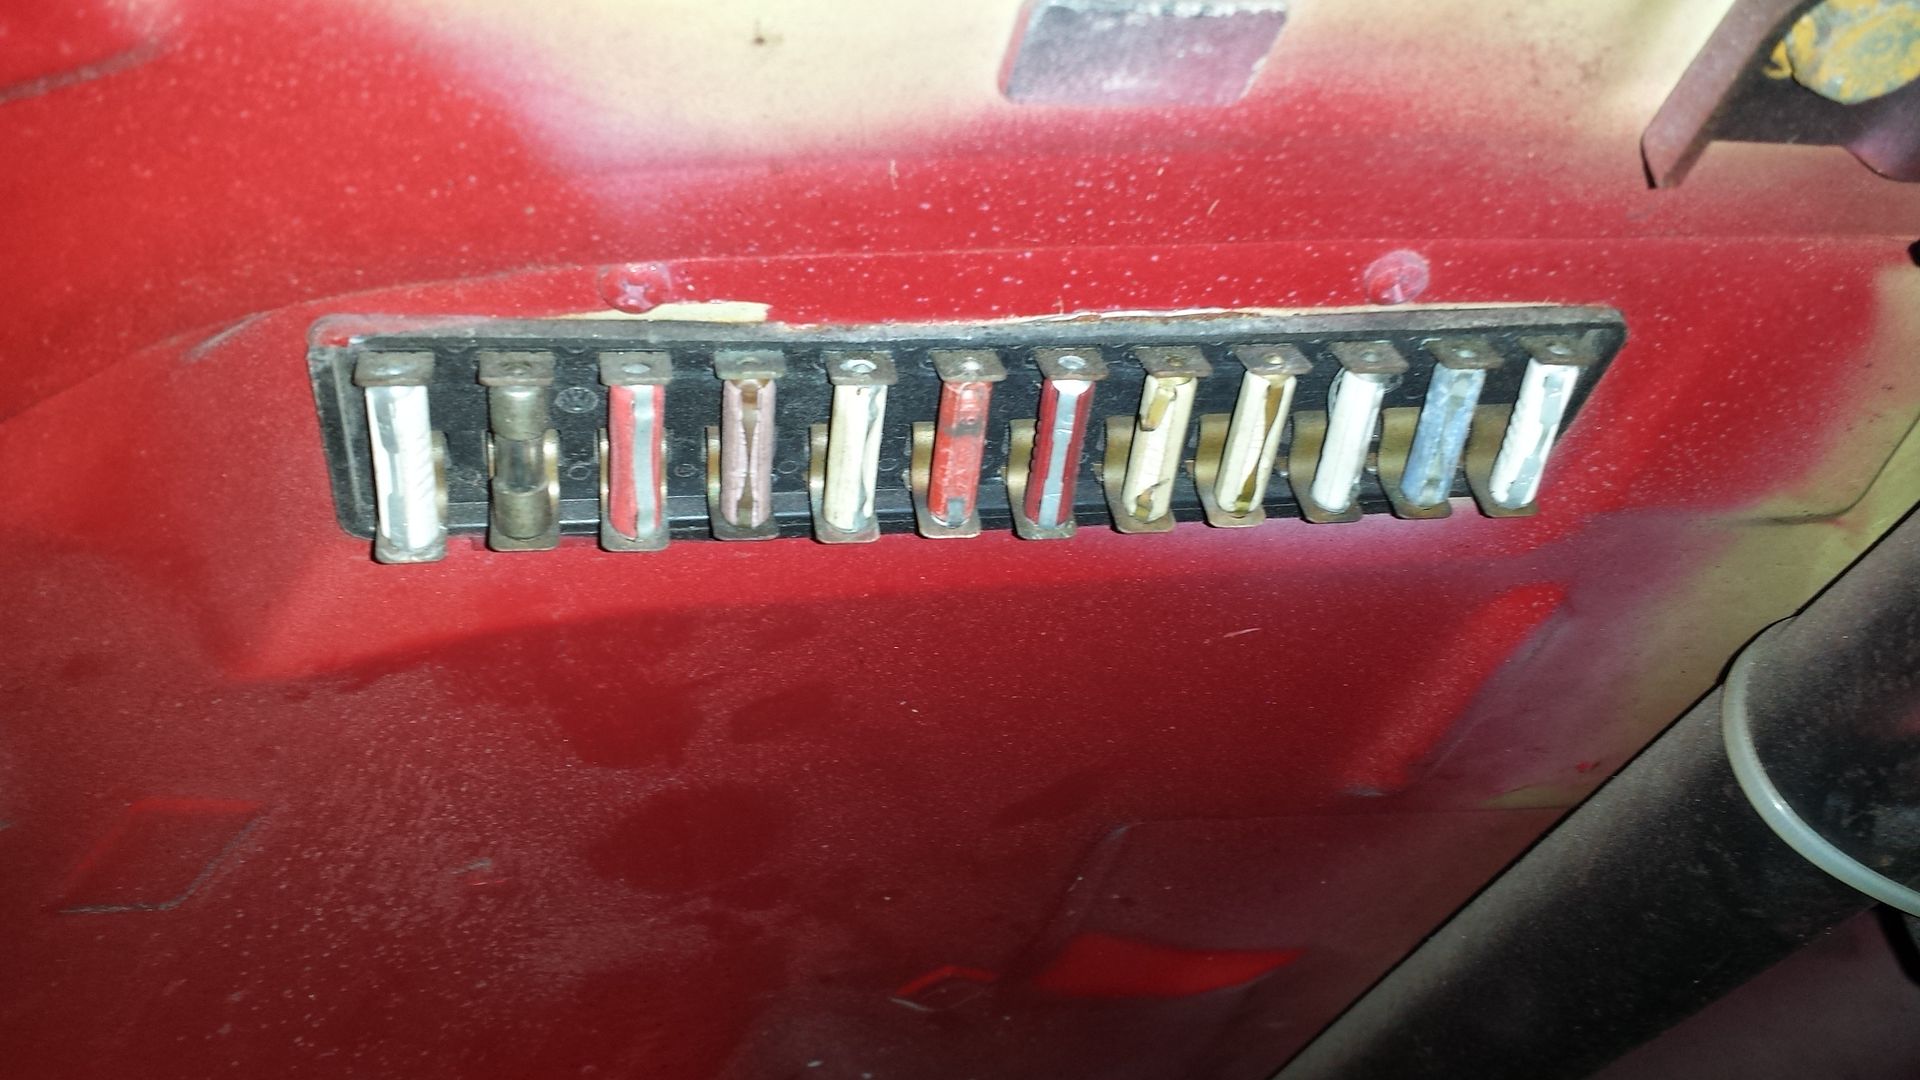
does anyone know if that diagram is correct for a 71 standard beetle? And which of the 2 fenders is correct for my front im hoping the passenger as its smaler
Re: my project 71
Posted: Thu Sep 08, 2016 1:06 am
by B MAN
iirc there's 12 posts & 10 post fuse boxes & all 12s wire the same, all 10 post boxes wire the same
Re: my project 71
Posted: Thu Sep 08, 2016 6:36 am
by Raj
elrockk wrote:i have 2 questions matbe you guys can help
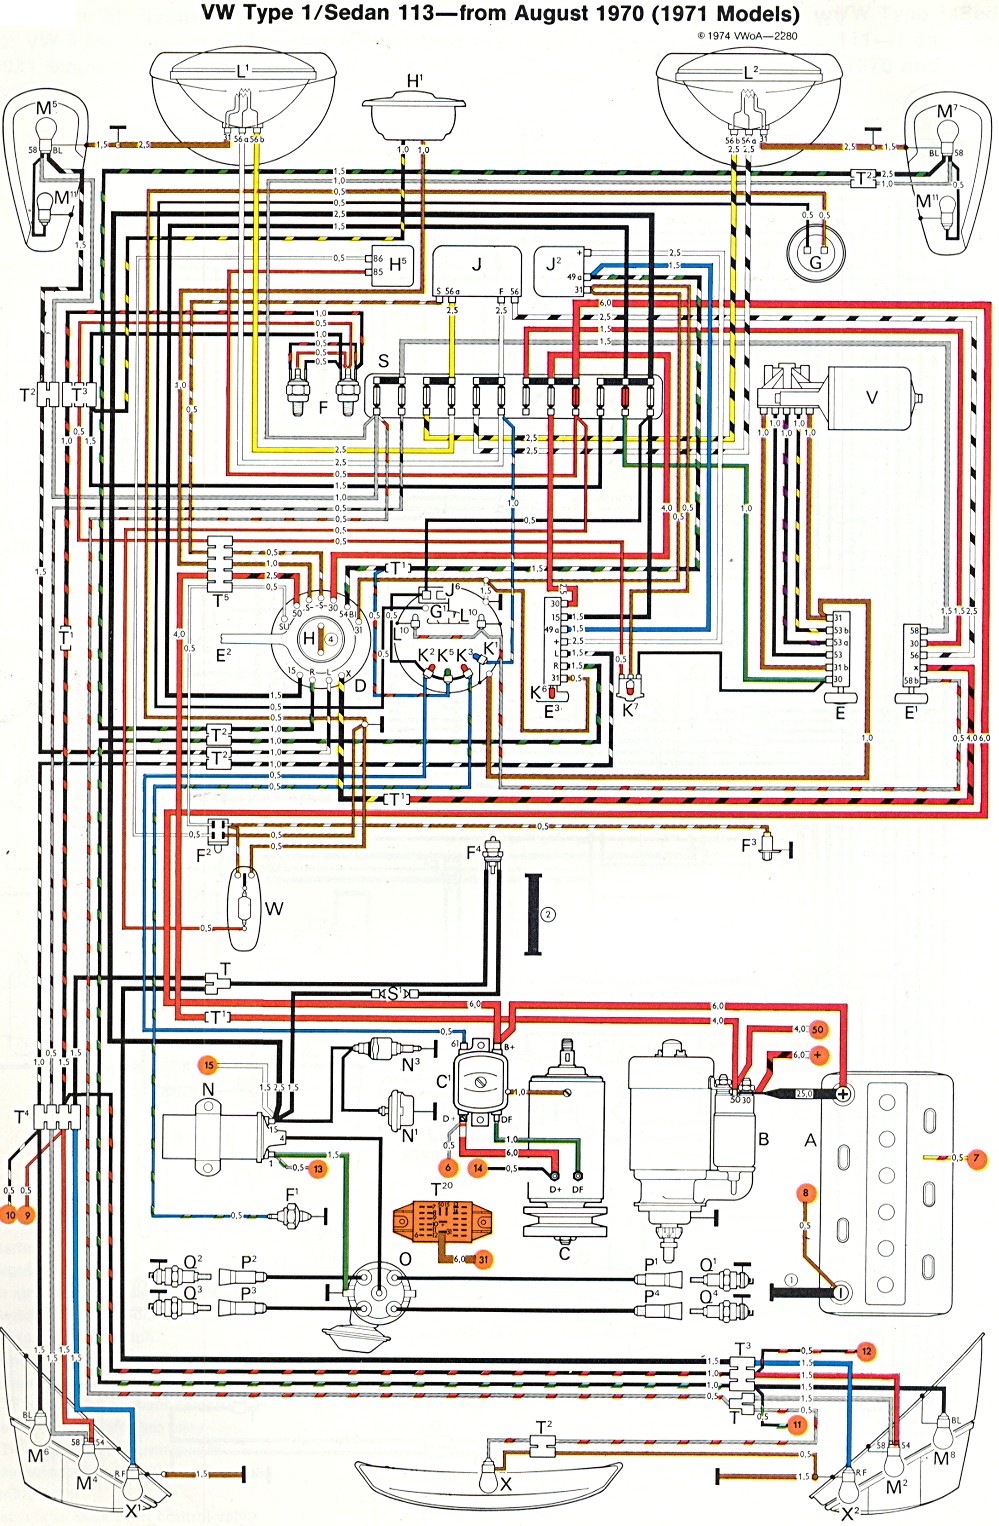
Looks like there was a change mid 71.... depending on the VIN. See attached
http://www.thesamba.com/vw/archives/inf ... _fixed.jpg
http://www.thesamba.com/vw/archives/inf ... per_71.jpg
Re: my project 71
Posted: Thu Sep 08, 2016 7:30 pm
by elrockk
thanks the fixed 0ne is what i have. replaced them all as per that diagram no smoke got somebulbs out wiil work on that tomorrow .signed up for insurance with Haggertys $181a year looks like license plates next week
Re: my project 71
Posted: Fri Sep 09, 2016 6:38 am
by Big_kid
Uh oh! I think you'll be on the road before me! Good job on working it out with no smoke, I wasn't that lucky. I installed new Empi turn signals up front, tested them at the time, they were good. When I hooked up the signal switch, the R/F had developed a short and let the smoke out of the switch and the wire leading to it.
Looking good! Keep at it, you'll be done (like they're ever "done") soon!
Re: my project 71
Posted: Fri Sep 09, 2016 7:37 pm
by elrockk
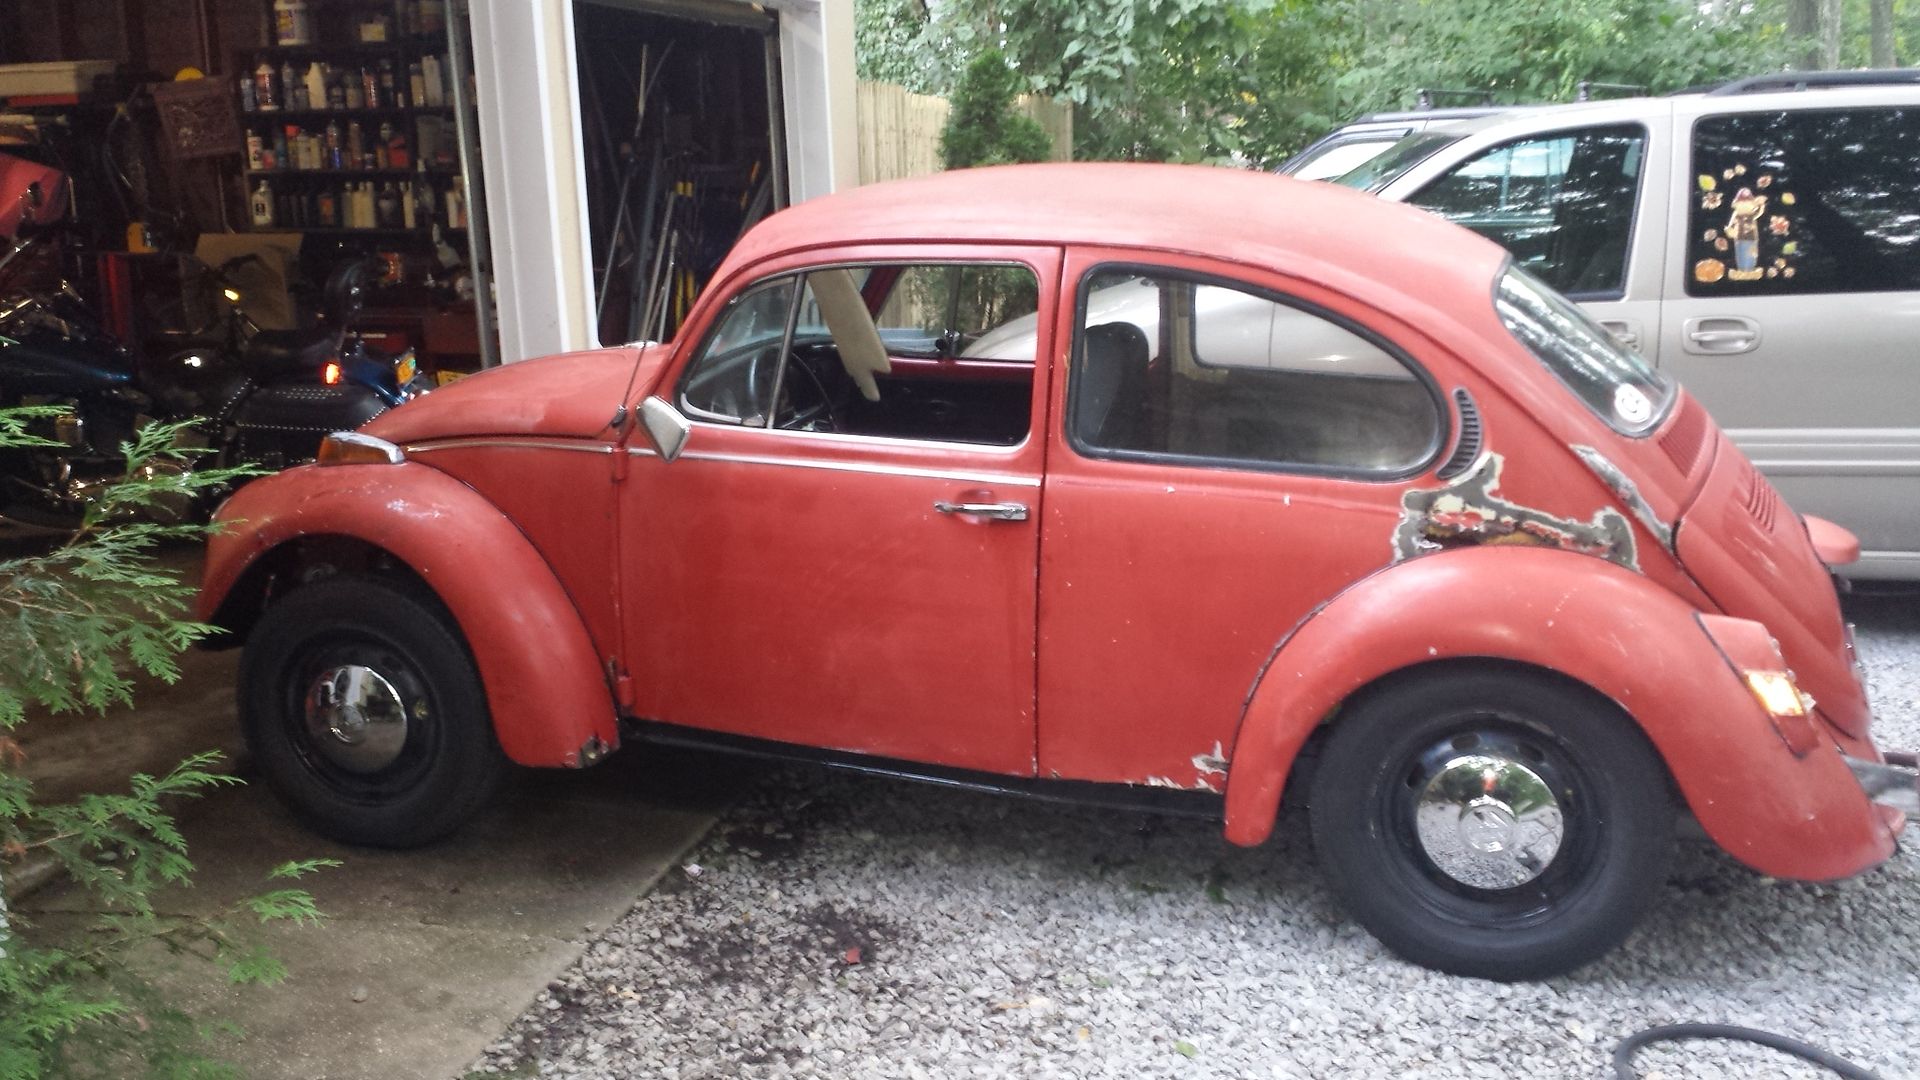
far from done i took the car apart and kind of did a Triage on it. fix the chassis/heater channels and bought all the pieces i could to fix the rust.put it back together still needing lots of work but road worthy in mybook. now i can pick a smaller project at a time instead of trying to get it all done at once
Re: my project 71
Posted: Fri Sep 09, 2016 7:47 pm
by elrockk
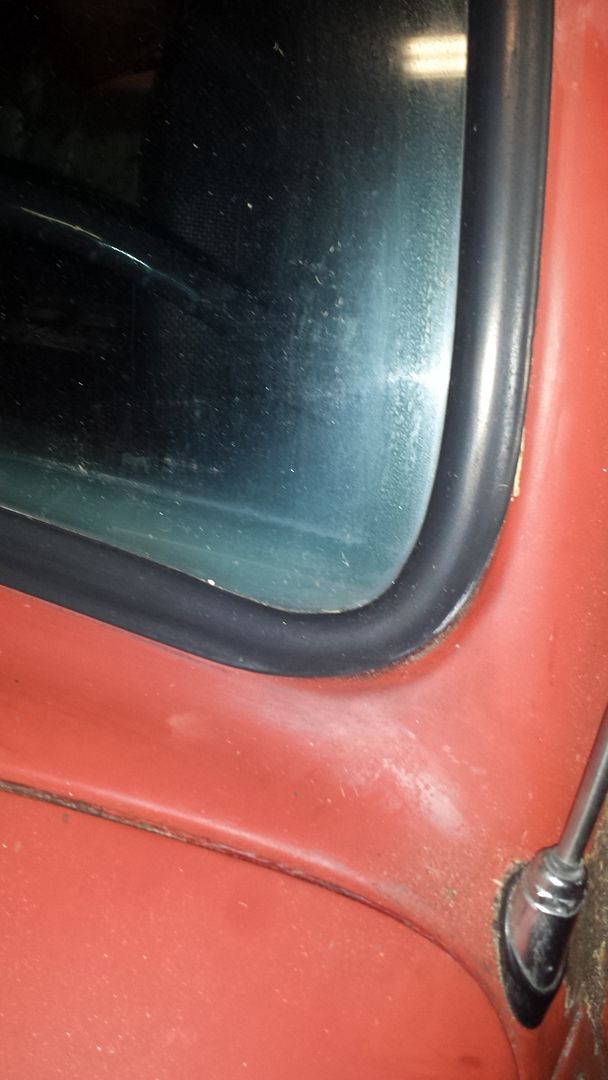
so tonight i figured i would clean the windows the car was last on the road in 2009
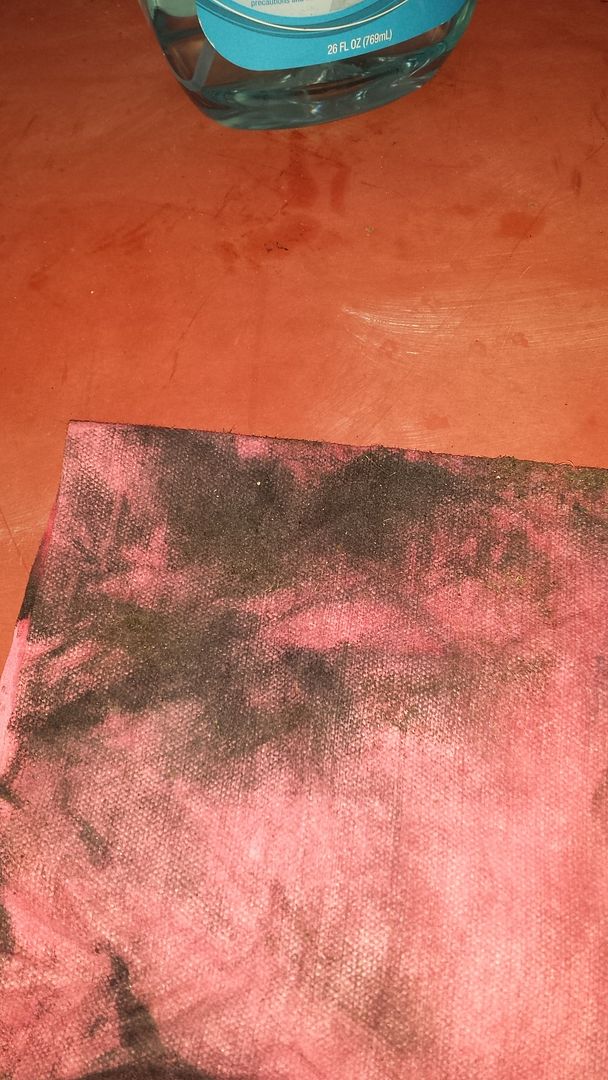
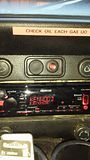
i could feel the chunks coming offthe glass is this smokey looking stuff fixable?
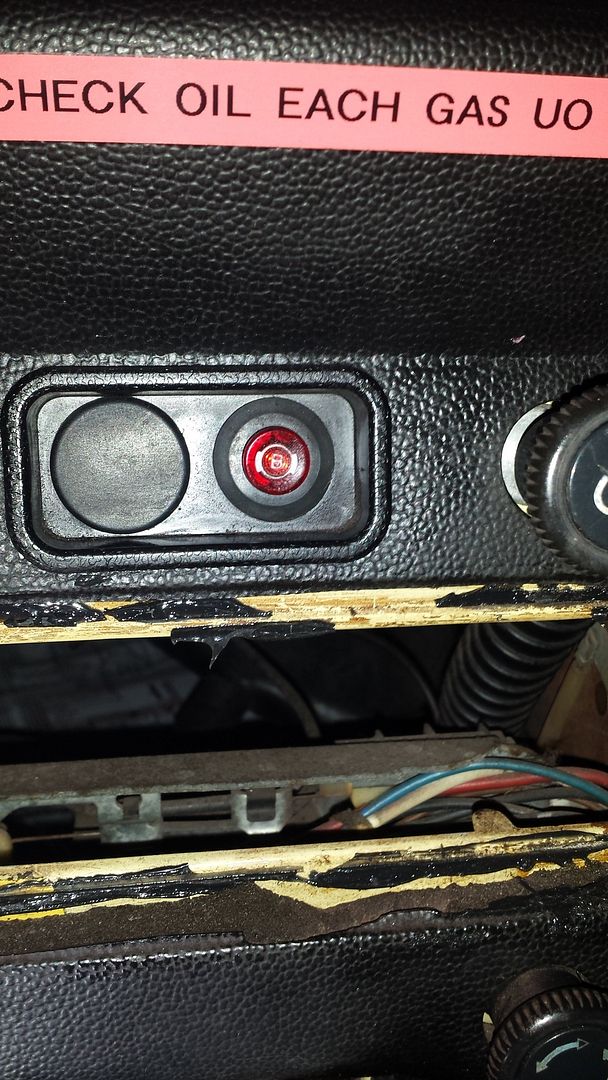
and what does this button do?
Re: my project 71
Posted: Fri Sep 09, 2016 8:38 pm
by ObnoxiousBlue
I've found a great way to get windows clean with that kind of grime is with some simple green and a razor. Gently scrape the glass while using the simple green as a lubricant and you'll be surprised how clean they come.
The haze in the window is not fixable, shy of replacement. But it's not a hard thing to do, even easier with two people and twenty minutes.
As for the button, it's the brake circuit test. Also will will you if one of the brake circuits go bad. IIRC, pushing the button should make it illuminate, so as to allow you to test it and know the light works. If it comes on on its own one of the brake circuits failed.
Re: my project 71
Posted: Sat Sep 10, 2016 6:41 pm
by elrockk
yeah last night i cleaned them 2 times with windex and still had stuff on the window. so today i used some formula 409 which got a lot more dirt off but still not clean. got some BonAmi and scrubed the windows much better but still some stains that wont leave

gave it its first wash since 2009
looking better at least its clean to the touch.then started chasing some inop bulbs and narrowed down the problems to the turn signal switch and some shoddy previus repairs
so tonight ill rewatch somebug me videos i think i remember him doing steering colums
Re: my project 71
Posted: Sat Sep 10, 2016 6:53 pm
by elrockk
maybe some input i say leave the old window stickers on the car
my wife says scrape them .i think they are part of the cars Mojo/Karma the wife say Mojo/Karma dies with new owner
Re: my project 71
Posted: Sat Sep 10, 2016 8:36 pm
by B MAN
Re: my project 71
Posted: Sat Sep 10, 2016 8:40 pm
by Big_kid
Old stickers... your car, your call.
I just replaced my turn signal switch today, it wasn't as bad as I'd thought. I replaced it a few years ago, but I was in a Crohns flare at the time and doing anything was difficult back then. That one I managed to break the self canceling feature before I even got it in. This time Frank (at the Bug House) reminded me not to play with it AT ALL before it was installed, as he has seen several of them detonate from being played with. The new one is in, now I just need to wire it up. The replacement was pretty straightforward. Pull the horn ring, watch for the 3 screws, springs and star washers, loosen the nut, yank the wheel back WITH THE NUT IN PLACE so as not to break my nose (a repo man taught me to pull wheels that way), mark the wheel in relation to the shaft(splines aren't indexed), 4 screws hold the switch in- pull them, swap the switch, I wrapped the new wires with a zip tie to keep them together and to give me something semi rigid to feed through the column and pull the wires through with. Assembly is reverse of the above. I DID have to use a razor knife to clean up some plastic from the mounting holes, but aside from that it was straightforward and uneventful. I was also getting into a time crunch, so I don't think I got any pics. It's really not difficult. Seeing what you've already done with this car I doubt you'll have any trouble.
Re: my project 71
Posted: Mon Sep 12, 2016 8:18 am
by Raj
I love the old stickers.... not so much the new one.
Re: my project 71
Posted: Mon Sep 12, 2016 7:24 pm
by elrockk
so i took the turn signal switch out to repair the twisted wire connections and found out there 5 or so wires missing.so ill order a new one and figure out where the wires go. while i had the steering wheel off i thought it would be a got time to open up the radio hole and install the radio i got for christmas
not bad sound for 1 45 year old speaker. i got 4 new ones just got to figure out where im putting them.


 got a coat of rustolium on the inner fenders
  and got the rear fenders on loose
 gonna get front fenders on tomorrow
 got front and rear fenders installed
  apparently ive got 2 different fenders in the front and 2 left side
  but i got all the lights installed and mini bumbers
 this is a picture of the fuse panel of a 1971 beetle i think 10 / 8 amp fuses and 2 / 16 in positions 9/10 this iswhat i got
  does anyone know if that diagram is correct for a 71 standard beetle? And which of the 2 fenders is correct for my front im hoping the passenger as its smaler
 i could feel the chunks coming offthe glass is this smokey looking stuff fixable?
  and what does this button do?
 gave it its first wash since 2009
  looking better at least its clean to the touch.then started chasing some inop bulbs and narrowed down the problems to the turn signal switch and some shoddy previus repairs
  so tonight ill rewatch somebug me videos i think i remember him doing steering colums