'71 White Wagon
Forum rules
Please recycle your forum, and utilize the same chat for all projects related to a single vehicle.
We recommend a broad title such as your name, car year and model; such that it is applicable to whatever projects you tackle.
For issues related to a vehicle specific part, aftermarket accessories, or replacement parts please include the year, model, and application.
For engine related questions also include your engine size and configuration, along with any upgrades or modifications.
-
AoT
- Posts: 1029
- Joined: Fri Oct 17, 2008 8:09 pm
- First Name: Audrey
- Vehicle Year: 1974
- Model: Beetle
- Location: Ready for a road trip....
Re: '71 White Wagon
When doing my Samba search I also came across two other items of interest. There is an accelerator pedal stop for the bus. In the floor boards there are two holes under the top edge of where the pedal descends and a cutout in the floor mat. Seems as though a stop was put in to limit stress on the throttle but most are gone and a replacement is hard to find. Fortunately some one posted up the dimensions to make one. This was a design element to protect excess push on the pedal to push the throttle.
The other item is a spring plate under the pedal to give it a good return.
Time to do some shopping!!
The other item is a spring plate under the pedal to give it a good return.
Time to do some shopping!!
Keep working at it and it gets done!!
-
AoT
- Posts: 1029
- Joined: Fri Oct 17, 2008 8:09 pm
- First Name: Audrey
- Vehicle Year: 1974
- Model: Beetle
- Location: Ready for a road trip....
Re: '71 White Wagon
Picked up 3/8" PEX to use as the flex tube for the accel cable. Will get that on this weekend while I have everything open working on the carb.
I have been investigating removing the instrument panel to get the bulb replaced or the wires reseated for the oil pressure light. there are clips that hold the panel face onto the dash so I will have to negotiate the removal/replacement. Anyone have any experience on this?
I had found a thread on the samba covering this topic and they recommended removing the turn signal light to gain access. I thought this was a great idea until i realized that he had a late year bay. My turn signals are bumper height so cancel that idea!
Keep working at it and it gets done!!
- ObnoxiousBlue
- Site Admin
- Posts: 1422
- Joined: Tue Sep 09, 2008 5:23 pm
- First Name: Mike
- Vehicle Year: 1964
- Model: Beetle
- Location: Above ground...
- Contact:
Re: '71 White Wagon
Audrey, start by reaching up under the dash and unscrew the speedo cable. The cable doesn't have alot of play (at least not in a late bay) so by removing it you by yourself a couple inches to work with. Then, there are four screws on the corners of the cluster, which hold four hooks on the back of the dash. These hooks are shaped like "J's". You won't have any issue getting them off, frankly, just keep unscrewing them until the hooks fall to the floor (and they will) Putting them in is a bit more of a trick because you have to reach under the dash to hold the hook from rotating while you tighten the trim screws on the front. The hook end of the J seats inside a small channel behind the dash board opening and that's where you need to keep it so the cluster pulls in tight. It's not difficult. The only "hard" part is squeezing your hand up under the dash to the top right screw. The rack for the temperature control levers is there, so if you have small hands you shouldn't have too much of an issue.
Re: '71 White Wagon
great to hear some progress on the bus! This gets me motivated to finish the house so I can work on my cars.
Keep your eyes peeled at Etown swap for the accel cable conduit. Im sure they can be found cheap there.
Keep your eyes peeled at Etown swap for the accel cable conduit. Im sure they can be found cheap there.
Glenn wrote:I have to say, this "gruppe" is so much more than just a car club.
MrBreeze wrote: This is the DVG board. The threads flow as they flow.
Deal with it.
-
AoT
- Posts: 1029
- Joined: Fri Oct 17, 2008 8:09 pm
- First Name: Audrey
- Vehicle Year: 1974
- Model: Beetle
- Location: Ready for a road trip....
Re: '71 White Wagon
Got some bus time in today even though it was chilly.
Started with the accel cable. I bought 3/8 inch PEX and made a tube to go from the exit of the chassis tube to the throttle conduit. PEX slide right over the chassis tube which I anchored with a hose clamp and ran it right up to throttle conduit, No more hanging in mid air.
Trying to work on the carb has been tricky to keep it running so I made a remote start using a horn button. It worked great.
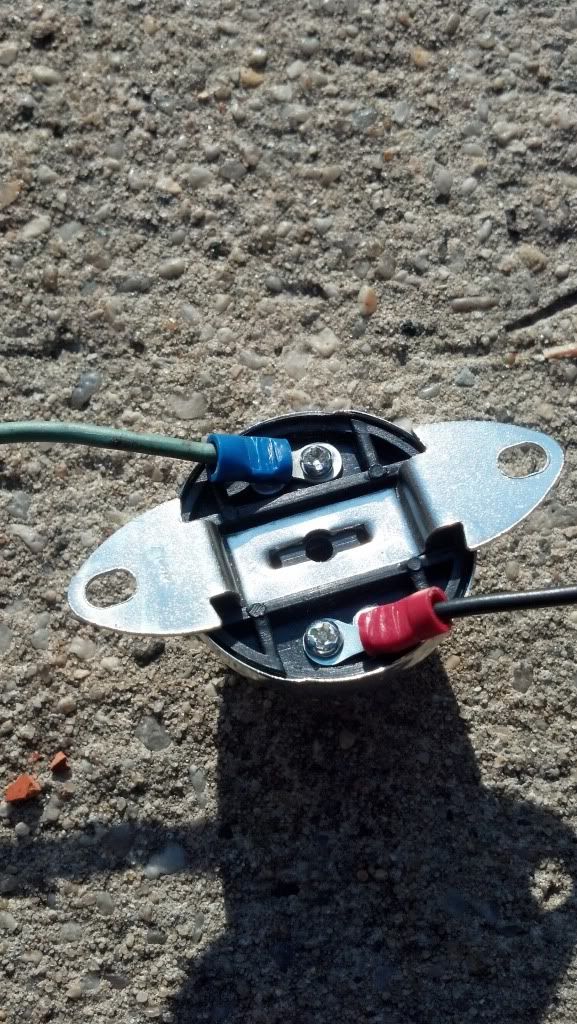
Had the accel cable off the throttle and I got the carb to run for 15 minutes but it def needs some fine adjustment. To be continued in getting this done.
Moved up to the front of the bus. The oil pressure light is not working. Took the front dash off and got the speedo off (finally!!). The wiring is a mess and I navigated my way to trace out some issues.
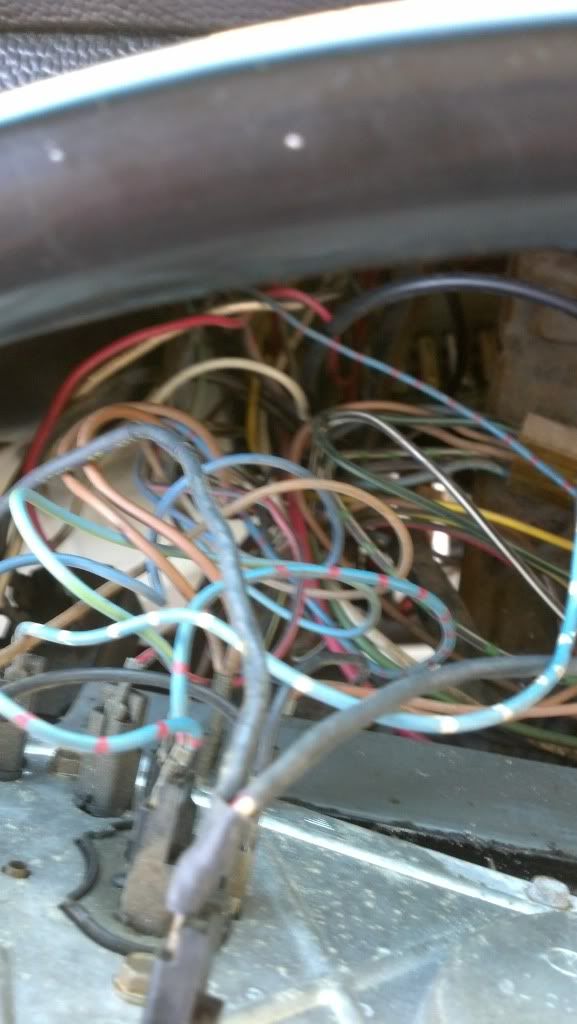
I replaced the bulb in the oil pressure lamp but still no go. Here's the scenario. It has a solid blue wire off the OP switch and runs up to the front. The wire on the OP lamp is blue/green and that runs down to a t-connector. There is no blue wire on the t-connector. The right turn signal lamp (blue with red stripe) is sharing some type of port with OP lamp, which works. Then there is a black wire going down to fuse 12 which has power. My thought is that the wire on the OP switch is not completing the circuit so I am going to run a wire from the OP switch to the lamp and see if that corrects the problem.
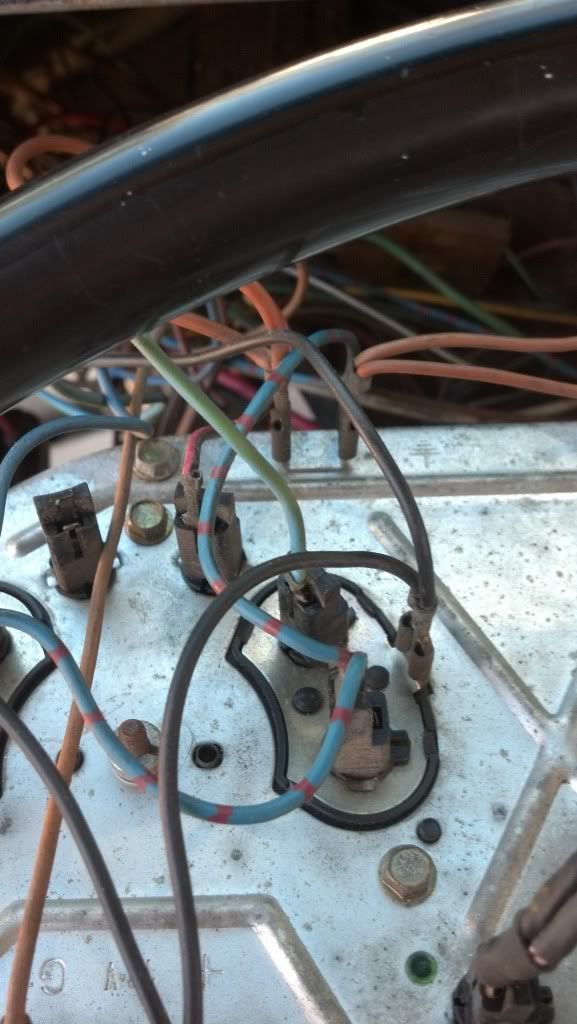
Another issues. At the base of the instrument panel there are two male connectors. Off the right one there is a pigtail with brown wires. One goes to the rear window defogger and the other in not connected to anything. I cannot figure out where it is supposed to go if anyone has a clue?

Back at it tomorrow!

Started with the accel cable. I bought 3/8 inch PEX and made a tube to go from the exit of the chassis tube to the throttle conduit. PEX slide right over the chassis tube which I anchored with a hose clamp and ran it right up to throttle conduit, No more hanging in mid air.
Trying to work on the carb has been tricky to keep it running so I made a remote start using a horn button. It worked great.

Had the accel cable off the throttle and I got the carb to run for 15 minutes but it def needs some fine adjustment. To be continued in getting this done.
Moved up to the front of the bus. The oil pressure light is not working. Took the front dash off and got the speedo off (finally!!). The wiring is a mess and I navigated my way to trace out some issues.

I replaced the bulb in the oil pressure lamp but still no go. Here's the scenario. It has a solid blue wire off the OP switch and runs up to the front. The wire on the OP lamp is blue/green and that runs down to a t-connector. There is no blue wire on the t-connector. The right turn signal lamp (blue with red stripe) is sharing some type of port with OP lamp, which works. Then there is a black wire going down to fuse 12 which has power. My thought is that the wire on the OP switch is not completing the circuit so I am going to run a wire from the OP switch to the lamp and see if that corrects the problem.

Another issues. At the base of the instrument panel there are two male connectors. Off the right one there is a pigtail with brown wires. One goes to the rear window defogger and the other in not connected to anything. I cannot figure out where it is supposed to go if anyone has a clue?

Back at it tomorrow!
Keep working at it and it gets done!!
-
EDNCAROL
- Posts: 763
- Joined: Wed Oct 01, 2008 12:25 pm
- First Name: ED
- Vehicle Year: 1974
- Model: Not Listed
- Location: East of Glenn West of Jimbo
Re: '71 White Wagon
You sure the oil pressure switch is good?
Still Monkeying Around. Not afraid to tell you how I really feel.
-
Big_kid
Re: '71 White Wagon
In my donor, all the grounds were brown. I'd imagine buses are the same.
-
AoT
- Posts: 1029
- Joined: Fri Oct 17, 2008 8:09 pm
- First Name: Audrey
- Vehicle Year: 1974
- Model: Beetle
- Location: Ready for a road trip....
Re: '71 White Wagon
Just got new one put in Feb out at GT.EDNCAROL wrote:You sure the oil pressure switch is good?
Keep working at it and it gets done!!
- Brown
- Posts: 653
- Joined: Sun Sep 14, 2008 8:13 pm
- First Name: Ken
- Location: South Shore of Nassau County
Re: '71 White Wagon
Agreed brown wires are ground.Big_kid wrote:In my donor, all the grounds were brown. I'd imagine buses are the same.
I think with the key on, disconnect the wire from the OP and touch it to ground and light should come on. If it does the the wire is connected properly and the oil press switch is the problem. When ops was put on, was Teflon tape used? That would keep it from grounding itself
"THE BLEEDER"
- Glenn
- Posts: 3207
- Joined: Tue Sep 09, 2008 4:20 pm
- First Name: Glenn
- Vehicle Year: 1974
- Model: Beetle
- Location: Long Island, New York, USA
- Contact:
Re: '71 White Wagon
Correct.Brown wrote:Agreed brown wires are ground.Big_kid wrote:In my donor, all the grounds were brown. I'd imagine buses are the same.
I think with the key on, disconnect the wire from the OP and touch it to ground and light should come on. If it does the the wire is connected properly and the oil press switch is the problem. When ops was put on, was Teflon tape used? That would keep it from grounding itself
With the key on, grounding the wire should illuminate the light.
Glenn
74 Beetle Specs | 74 Beetle Restoration | 2180cc Engine
"You may not get what you pay for, but you always pay for what you get"
When you mess with the bull, you get the horns.
74 Beetle Specs | 74 Beetle Restoration | 2180cc Engine
"You may not get what you pay for, but you always pay for what you get"
When you mess with the bull, you get the horns.
Re: '71 White Wagon
Great work aud. stay at it!
Glenn wrote:I have to say, this "gruppe" is so much more than just a car club.
MrBreeze wrote: This is the DVG board. The threads flow as they flow.
Deal with it.
-
AoT
- Posts: 1029
- Joined: Fri Oct 17, 2008 8:09 pm
- First Name: Audrey
- Vehicle Year: 1974
- Model: Beetle
- Location: Ready for a road trip....
Re: '71 White Wagon
Well, the short version is I got the OP lamp to light. It was a combo of many factors with splices in the lines and bad connection at the lamp. The female connector basically severed so I had to "borrow" a wire from one that is not a priority. The lamp female connection is 1/8" and I did not have any in my arsenal. Once I get the connector issue resolved I will put back the loaner wire.

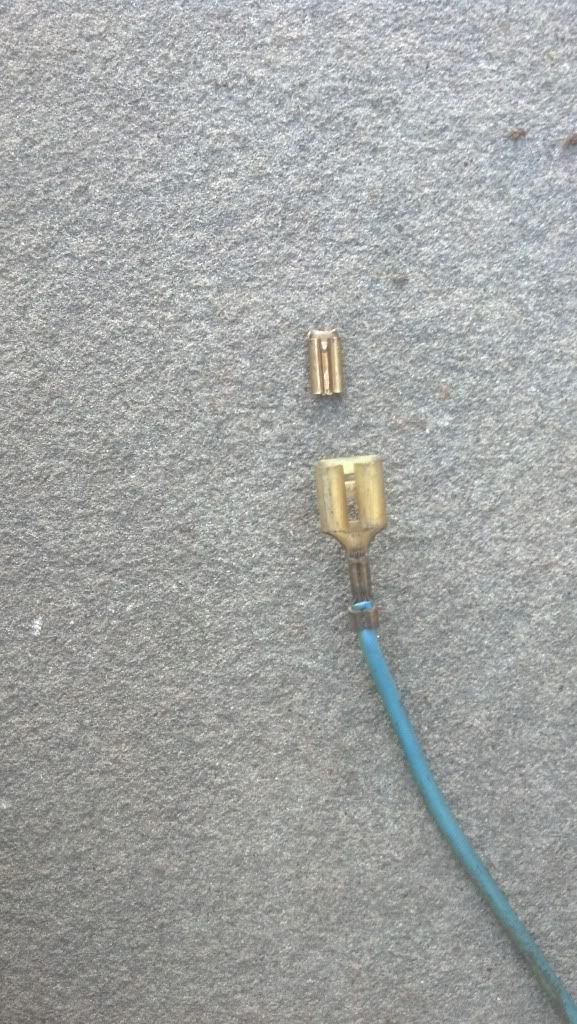
Still have a lot of cleaning out to do with the wires. There is a nice VDO clock that is not working and one reason is there is not connection to what I would say is a relay of some sort. Need to check the wiring diagram for more 411.
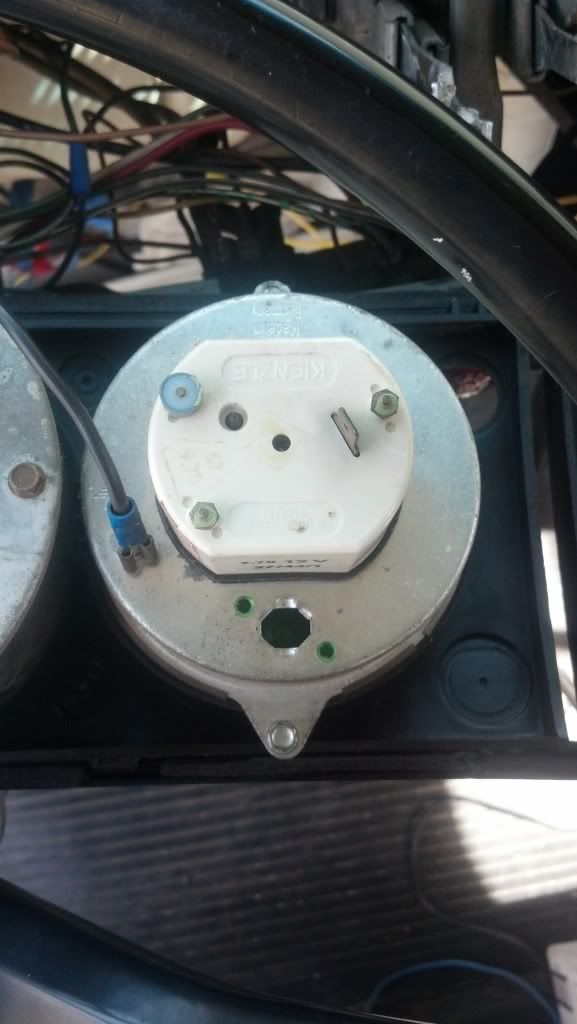
This is a full shot of the rear of the instrument panel but it is shown upside down since I can only flip it out without disconnecting the wiring.


Moving over to the Wonder to get some work done there....


Still have a lot of cleaning out to do with the wires. There is a nice VDO clock that is not working and one reason is there is not connection to what I would say is a relay of some sort. Need to check the wiring diagram for more 411.

This is a full shot of the rear of the instrument panel but it is shown upside down since I can only flip it out without disconnecting the wiring.


Moving over to the Wonder to get some work done there....
Last edited by AoT on Sun Apr 07, 2013 5:55 pm, edited 1 time in total.
Keep working at it and it gets done!!
- ObnoxiousBlue
- Site Admin
- Posts: 1422
- Joined: Tue Sep 09, 2008 5:23 pm
- First Name: Mike
- Vehicle Year: 1964
- Model: Beetle
- Location: Above ground...
- Contact:
Re: '71 White Wagon
AoT wrote:There is a nice VDO clock...
Wait, your bus has the clock?
-
AoT
- Posts: 1029
- Joined: Fri Oct 17, 2008 8:09 pm
- First Name: Audrey
- Vehicle Year: 1974
- Model: Beetle
- Location: Ready for a road trip....
Re: '71 White Wagon
ObnoxiousBlue wrote:AoT wrote:There is a nice VDO clock...
Wait, your bus has the clock?
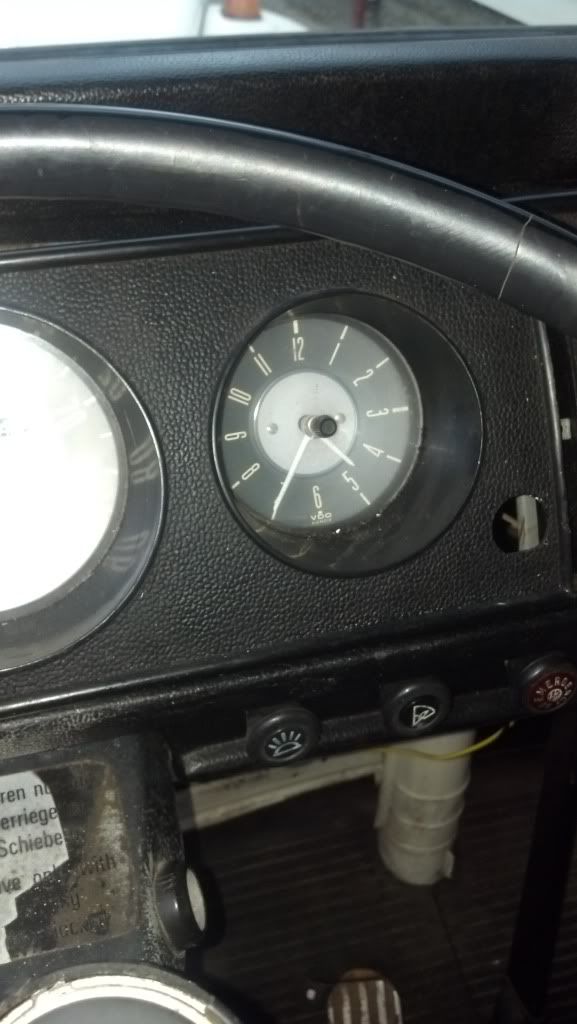
Oh yeah. It 5:00 somewhere!!
Keep working at it and it gets done!!
- Glenn
- Posts: 3207
- Joined: Tue Sep 09, 2008 4:20 pm
- First Name: Glenn
- Vehicle Year: 1974
- Model: Beetle
- Location: Long Island, New York, USA
- Contact:
Re: '71 White Wagon
At least it's correct twice a day.
Glenn
74 Beetle Specs | 74 Beetle Restoration | 2180cc Engine
"You may not get what you pay for, but you always pay for what you get"
When you mess with the bull, you get the horns.
74 Beetle Specs | 74 Beetle Restoration | 2180cc Engine
"You may not get what you pay for, but you always pay for what you get"
When you mess with the bull, you get the horns.
-
AoT
- Posts: 1029
- Joined: Fri Oct 17, 2008 8:09 pm
- First Name: Audrey
- Vehicle Year: 1974
- Model: Beetle
- Location: Ready for a road trip....
Re: '71 White Wagon
Looks like it may stay that way for awhiile. I wired up the lamp and took power to the back of the clock but its not ticking!! The manual knob on the front just spins so it needs more than juice. I was able to get the lamp to light so at least it looks good!Glenn wrote:At least it's correct twice a day.

The small female connectors that go to the back of the dash lamps I found at Pep Boys. This is the fitting that was needed for the OP lamp. Got that scoop from the man from Oz. They are the .110 size if anyone ever needs that 411.

Need get some higher gauge wire to change some of the connections. I have been working with 14 but the dash uses 18 so want to keep it uniform. Wish there were more choices then just primary colors! Some of the combos in the bus are neat!!
Keep working at it and it gets done!!
-
AoT
- Posts: 1029
- Joined: Fri Oct 17, 2008 8:09 pm
- First Name: Audrey
- Vehicle Year: 1974
- Model: Beetle
- Location: Ready for a road trip....
Re: '71 White Wagon
Had a good day finishing up some bus projects. Finished some wiring behind the dash and then got that buttoned up. Everything needs a good wash and wipe and some black paint touchups. Got the dash front plate and control levers back in place

The PS door panel has been pending since pre-Sandy. I am not as happy with this side as the DS but it will have to do for a while. At least my handmade effort didn't cost big bucks. Unfortunately I haven't found a site that only sells the front door panels as I don't need a full kit. At least its clean and does the job. Now that the speakers are in I need to focus on getting the stereo installed for some road trips.

After sorting out the left overs from last year I gave it a vacuum and cleaned out the closets. Got to get ready to BBD. Needs a good wash and the rims need a scrub. I have a rim that I need to get a good spare on. First I am going to sand it down and give it a coat of paint. The spare that arrived with the bus does not pass the soapy water test. Need a 195/R14.

Gave the bus and the Wonder a good run today. Feels good having the time and temp to be working on the vw's.


The PS door panel has been pending since pre-Sandy. I am not as happy with this side as the DS but it will have to do for a while. At least my handmade effort didn't cost big bucks. Unfortunately I haven't found a site that only sells the front door panels as I don't need a full kit. At least its clean and does the job. Now that the speakers are in I need to focus on getting the stereo installed for some road trips.

After sorting out the left overs from last year I gave it a vacuum and cleaned out the closets. Got to get ready to BBD. Needs a good wash and the rims need a scrub. I have a rim that I need to get a good spare on. First I am going to sand it down and give it a coat of paint. The spare that arrived with the bus does not pass the soapy water test. Need a 195/R14.

Gave the bus and the Wonder a good run today. Feels good having the time and temp to be working on the vw's.
Keep working at it and it gets done!!
- ObnoxiousBlue
- Site Admin
- Posts: 1422
- Joined: Tue Sep 09, 2008 5:23 pm
- First Name: Mike
- Vehicle Year: 1964
- Model: Beetle
- Location: Above ground...
- Contact:
Re: '71 White Wagon
Looking good Audrey. Working under the dash sucks, no? Killed my back. Lol
- Glenn
- Posts: 3207
- Joined: Tue Sep 09, 2008 4:20 pm
- First Name: Glenn
- Vehicle Year: 1974
- Model: Beetle
- Location: Long Island, New York, USA
- Contact:
Re: '71 White Wagon
That's why I emptied both kids closets, cleaned the floors and everything that was on the floor. Then moved all the furniture and cleaned behind and under where it was.AoT wrote:So much to do and SO MUCH RAIN!!
I haven't done a through cleaning in 2 years or so.
Glenn
74 Beetle Specs | 74 Beetle Restoration | 2180cc Engine
"You may not get what you pay for, but you always pay for what you get"
When you mess with the bull, you get the horns.
74 Beetle Specs | 74 Beetle Restoration | 2180cc Engine
"You may not get what you pay for, but you always pay for what you get"
When you mess with the bull, you get the horns.
-
AoT
- Posts: 1029
- Joined: Fri Oct 17, 2008 8:09 pm
- First Name: Audrey
- Vehicle Year: 1974
- Model: Beetle
- Location: Ready for a road trip....
Re: '71 White Wagon
I can see why Mrs. Ring keeps you around!! Kudos to you!Glenn wrote:That's why I emptied both kids closets, cleaned the floors and everything that was on the floor. Then moved all the furniture and cleaned behind and under where it was.AoT wrote:So much to do and SO MUCH RAIN!!
I haven't done a through cleaning in 2 years or so.
Keep working at it and it gets done!!
- Glenn
- Posts: 3207
- Joined: Tue Sep 09, 2008 4:20 pm
- First Name: Glenn
- Vehicle Year: 1974
- Model: Beetle
- Location: Long Island, New York, USA
- Contact:
Re: '71 White Wagon
Yes... my Mom loves me for who i am.AoT wrote:I can see why Mrs. Ring keeps you around!! Kudos to you!
Glenn
74 Beetle Specs | 74 Beetle Restoration | 2180cc Engine
"You may not get what you pay for, but you always pay for what you get"
When you mess with the bull, you get the horns.
74 Beetle Specs | 74 Beetle Restoration | 2180cc Engine
"You may not get what you pay for, but you always pay for what you get"
When you mess with the bull, you get the horns.
- ObnoxiousBlue
- Site Admin
- Posts: 1422
- Joined: Tue Sep 09, 2008 5:23 pm
- First Name: Mike
- Vehicle Year: 1964
- Model: Beetle
- Location: Above ground...
- Contact:
Re: '71 White Wagon
She may love you for who you are, but she'd love you ALOT more if you were someone else!Glenn wrote: Yes... my Mom loves me for who i am.
- Glenn
- Posts: 3207
- Joined: Tue Sep 09, 2008 4:20 pm
- First Name: Glenn
- Vehicle Year: 1974
- Model: Beetle
- Location: Long Island, New York, USA
- Contact:
Re: '71 White Wagon
Mike,ObnoxiousBlue wrote:She may love you for who you are, but she'd love you ALOT more if you were someone else!Glenn wrote: Yes... my Mom loves me for who i am.
You for one knows that a mother's love is unconditional. After all, your mother loves you for who you are. Look at the losers you hang around with.
Glenn
74 Beetle Specs | 74 Beetle Restoration | 2180cc Engine
"You may not get what you pay for, but you always pay for what you get"
When you mess with the bull, you get the horns.
74 Beetle Specs | 74 Beetle Restoration | 2180cc Engine
"You may not get what you pay for, but you always pay for what you get"
When you mess with the bull, you get the horns.
- ObnoxiousBlue
- Site Admin
- Posts: 1422
- Joined: Tue Sep 09, 2008 5:23 pm
- First Name: Mike
- Vehicle Year: 1964
- Model: Beetle
- Location: Above ground...
- Contact:
Re: '71 White Wagon
The dead ones or you? LolGlenn wrote:Look at the losers you hang around with.

