AoT's White Wonder
Forum rules
Please recycle your forum, and utilize the same chat for all projects related to a single vehicle.
We recommend a broad title such as your name, car year and model; such that it is applicable to whatever projects you tackle.
For issues related to a vehicle specific part, aftermarket accessories, or replacement parts please include the year, model, and application.
For engine related questions also include your engine size and configuration, along with any upgrades or modifications.

Re: AoT's White Wonder
Looks real nice.
Re: AoT's White Wonder
Look great ! did you reuse the old cover or buy new?
I'm not an air cooled snob , I like them all !
Brown wrote:Tom is right!
-
AoT
- Posts: 1029
- Joined: Fri Oct 17, 2008 8:09 pm
- First Name: Audrey
- Vehicle Year: 1974
- Model: Beetle
- Location: Ready for a road trip....
Re: AoT's White Wonder
Before....Tom wrote:Look great ! did you reuse the old cover or buy new?
No, went with new. Wasn't a fan of the oyster color to pop the red!!
Keep working at it and it gets done!!
-
AoT
- Posts: 1029
- Joined: Fri Oct 17, 2008 8:09 pm
- First Name: Audrey
- Vehicle Year: 1974
- Model: Beetle
- Location: Ready for a road trip....
Re: AoT's White Wonder
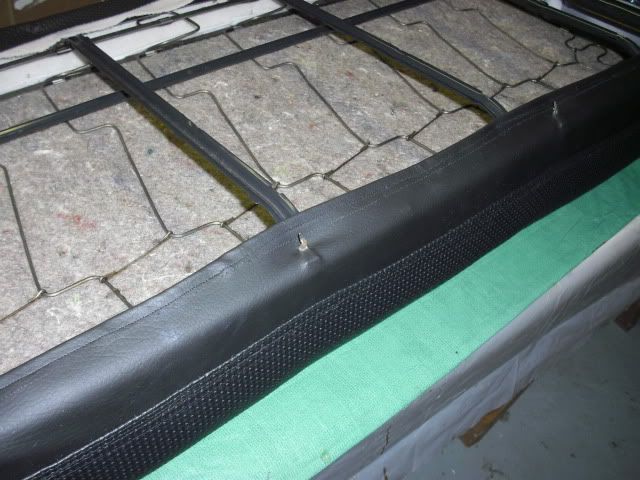
Finished up on the rear seat and elected to keep the metal tab in place and just made a small slice to slide it thru. Bottom cushion is done and looks fine.
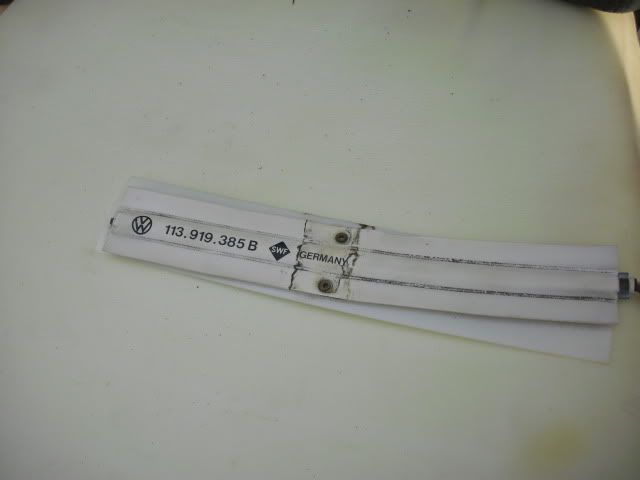
Now for the top rear, thats another story! Got it all stipped down, put the padding and foam on the frame and got the cover ready to go. Small problem is that it is way short. with the cover wrapped over the top and catching on the metal prongs the lower edge is way short. I have another set of seats that I looked at and there is a difference in the lower rear edge. The other seat has a beefy metal strip that allows the lower edge of the cover to be attached with screws and then covered with a masonsite board. No corresponding piece on my seat. Another else have this issue?
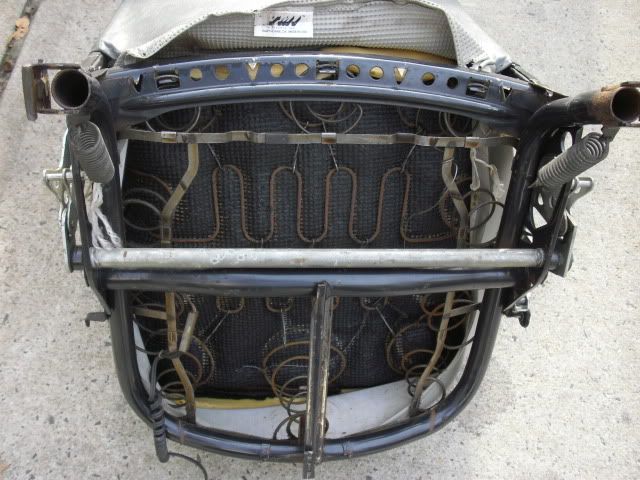
Old seats that look like a family of mice made a cozy home!
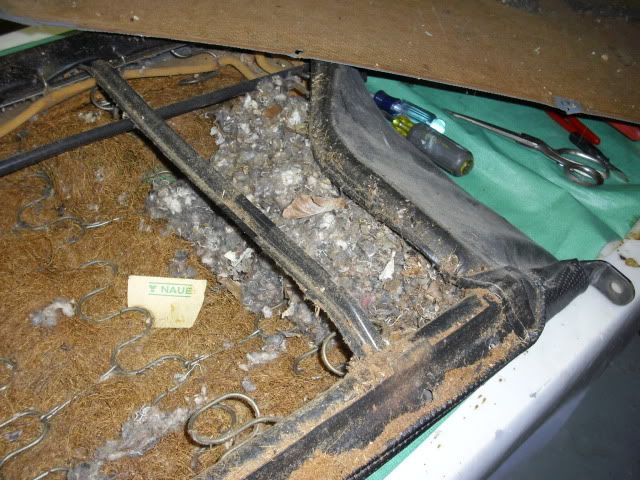
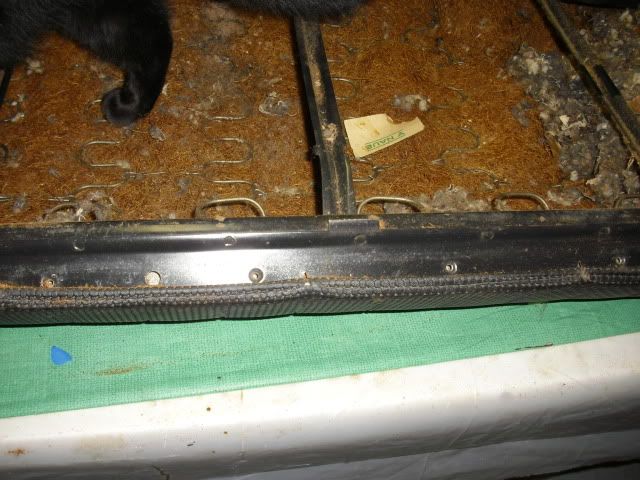
Metal strip on lower seat frame where the cover attaches with screws. I think Dubs was catching the scent of mice!!
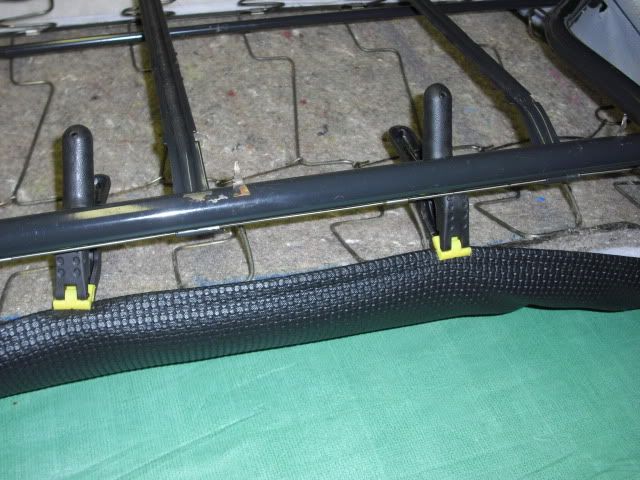
My frame that does not have metal strip and cover is short by three inches.
My option at this point is to sew an extension to the bottom of the cover and wrap it over the lower prongs. Wanted to have this done for the weekend but maybe I should look to see about another top bench frame.
Now for the top rear, thats another story! Got it all stipped down, put the padding and foam on the frame and got the cover ready to go. Small problem is that it is way short. with the cover wrapped over the top and catching on the metal prongs the lower edge is way short. I have another set of seats that I looked at and there is a difference in the lower rear edge. The other seat has a beefy metal strip that allows the lower edge of the cover to be attached with screws and then covered with a masonsite board. No corresponding piece on my seat. Another else have this issue?
Old seats that look like a family of mice made a cozy home!
Metal strip on lower seat frame where the cover attaches with screws. I think Dubs was catching the scent of mice!!
My frame that does not have metal strip and cover is short by three inches.
My option at this point is to sew an extension to the bottom of the cover and wrap it over the lower prongs. Wanted to have this done for the weekend but maybe I should look to see about another top bench frame.
Keep working at it and it gets done!!
-
AoT
- Posts: 1029
- Joined: Fri Oct 17, 2008 8:09 pm
- First Name: Audrey
- Vehicle Year: 1974
- Model: Beetle
- Location: Ready for a road trip....
Re: AoT's White Wonder
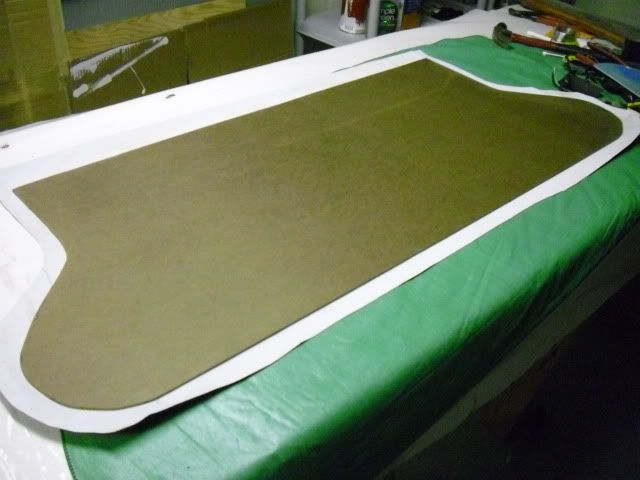
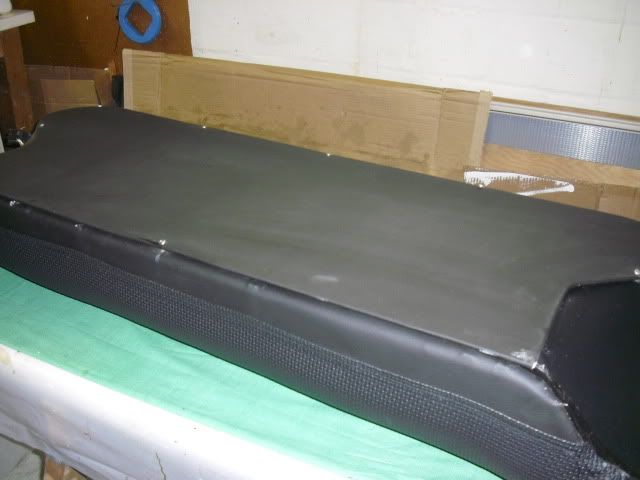
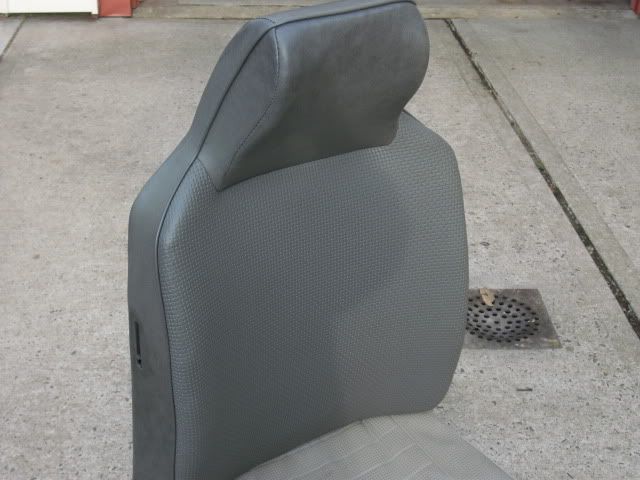
Did a little mod on the seat cover and sewed on an extension. Got it all tightened up on the prongs.
cut out a new piece of masonite to secure to the rear of the seat. The PO had cut it up and it was serving no function.
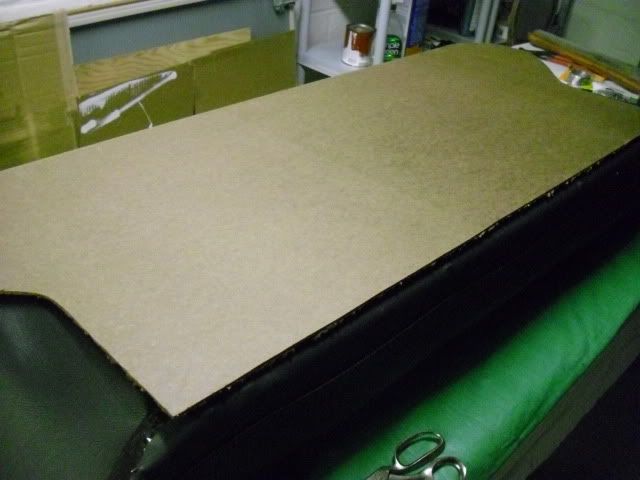
I am covering it with some black vinyl to give it a finished look from the outside. Hope to get it finished up today and the seats back in.
No worry, GA i still have enough scraps to make you that bikini!!

cut out a new piece of masonite to secure to the rear of the seat. The PO had cut it up and it was serving no function.
I am covering it with some black vinyl to give it a finished look from the outside. Hope to get it finished up today and the seats back in.
No worry, GA i still have enough scraps to make you that bikini!!
Keep working at it and it gets done!!
-
Glenn

- Posts: 3207
- Joined: Tue Sep 09, 2008 4:20 pm
- First Name: Glenn
- Vehicle Year: 1974
- Model: Beetle
- Location: Long Island, New York, USA
- Contact:
Re: AoT's White Wonder
No pics please.AoT wrote:No worry, GA i still have enough scraps to make you that bikini!!
Glenn
74 Beetle Specs | 74 Beetle Restoration | 2180cc Engine
"You may not get what you pay for, but you always pay for what you get"
When you mess with the bull, you get the horns.
74 Beetle Specs | 74 Beetle Restoration | 2180cc Engine
"You may not get what you pay for, but you always pay for what you get"
When you mess with the bull, you get the horns.
Re: AoT's White Wonder
Looks good.
-
AoT
- Posts: 1029
- Joined: Fri Oct 17, 2008 8:09 pm
- First Name: Audrey
- Vehicle Year: 1974
- Model: Beetle
- Location: Ready for a road trip....
Re: AoT's White Wonder
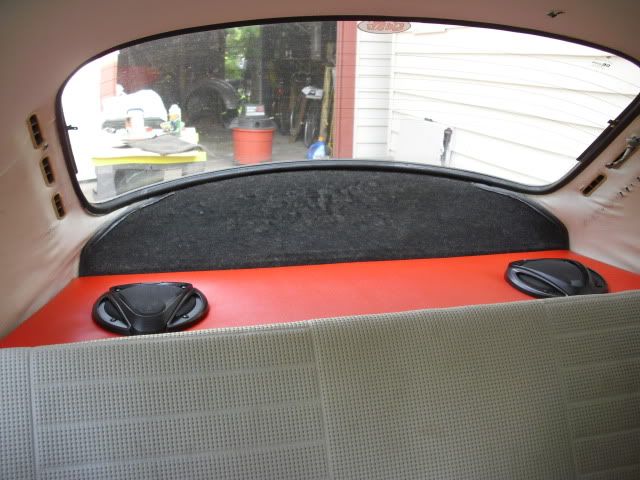
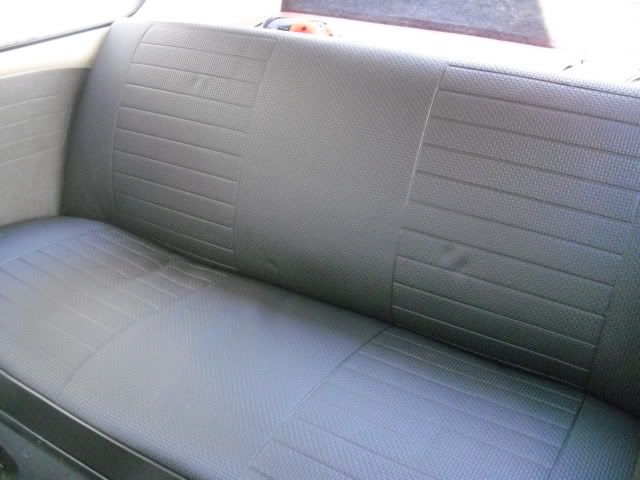
Finished up the seats. Back seat panel turned out good. Gives it a clean look. Have to pick up some black headed screws.
Got the rear seats installed and they feel and look so much better.
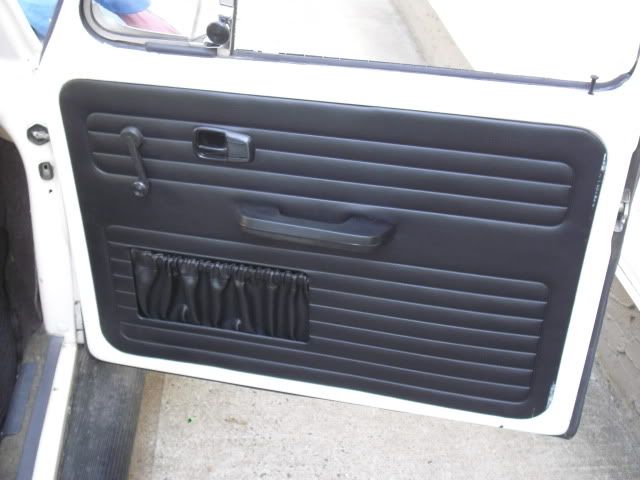
Finished up the door panels, needed to put on the arm rests, window cranks and door openers. it only took 6 months. Got the front hood handle back on too after having to cut it off after October Etown!
It washed and ready!
Got the rear seats installed and they feel and look so much better.
Finished up the door panels, needed to put on the arm rests, window cranks and door openers. it only took 6 months. Got the front hood handle back on too after having to cut it off after October Etown!
It washed and ready!
Keep working at it and it gets done!!
-
Glenn
- Posts: 3207
- Joined: Tue Sep 09, 2008 4:20 pm
- First Name: Glenn
- Vehicle Year: 1974
- Model: Beetle
- Location: Long Island, New York, USA
- Contact:
Re: AoT's White Wonder
Looks great.
Can't wait to try it out.
Can't wait to try it out.
Glenn
74 Beetle Specs | 74 Beetle Restoration | 2180cc Engine
"You may not get what you pay for, but you always pay for what you get"
When you mess with the bull, you get the horns.
74 Beetle Specs | 74 Beetle Restoration | 2180cc Engine
"You may not get what you pay for, but you always pay for what you get"
When you mess with the bull, you get the horns.

Re: AoT's White Wonder
nice job Aud. Very nice.
Glenn wrote:I have to say, this "gruppe" is so much more than just a car club.
MrBreeze wrote: This is the DVG board. The threads flow as they flow.
Deal with it.
-
AoT
- Posts: 1029
- Joined: Fri Oct 17, 2008 8:09 pm
- First Name: Audrey
- Vehicle Year: 1974
- Model: Beetle
- Location: Ready for a road trip....
Re: AoT's White Wonder
thanks. Yesterday was not easy but I perservered.Big_kid wrote:You make it look SO easy! Nice work!
Struggled (big time) to get the front PS out. Had the screwdriver holding down the leaf spring but it still would not release. After having thoughts of kissing the wonder goodbye, I went in from the side and got the spring to release. Turns out the leaf spring was not screwed down and there was no tension when I was applying pressure to get it to release. Finally got it to go.
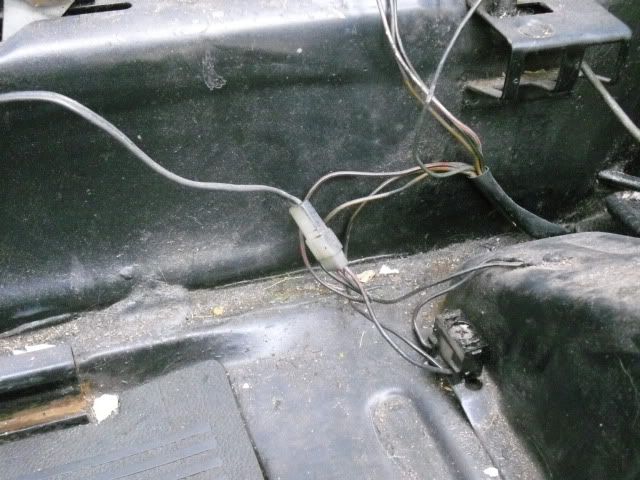
Found a nice blue seat cover under the one I removed, but the seat bottom was gone. Found the seat belt sensor under the padding. Its alot bigger than I thought it would be but I guess there are alot of big FA's.
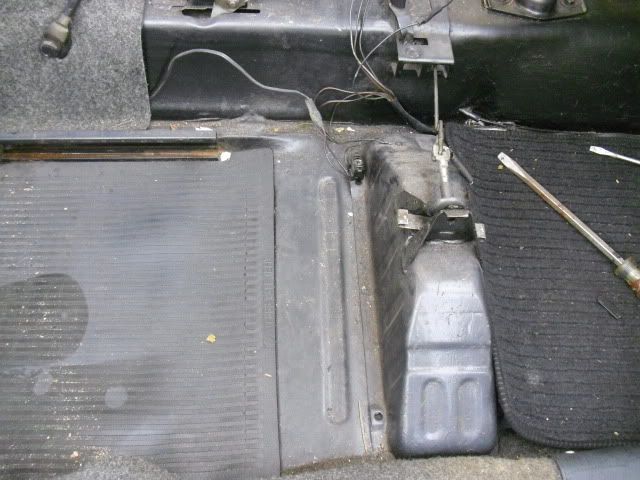
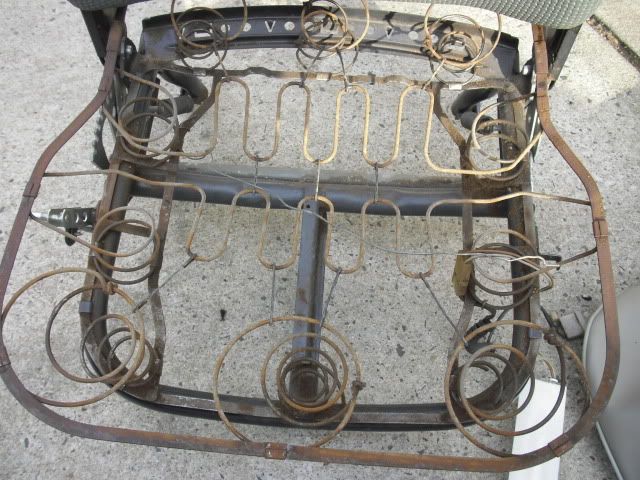
Stripped everything down and washed off the frame. I am posting some of the pics I took so that if someone else if looking to do this you can see whats underneath.
The wires for the seat belt buzzer are going but not sure what the wire to the rear ( in that connector) is for?
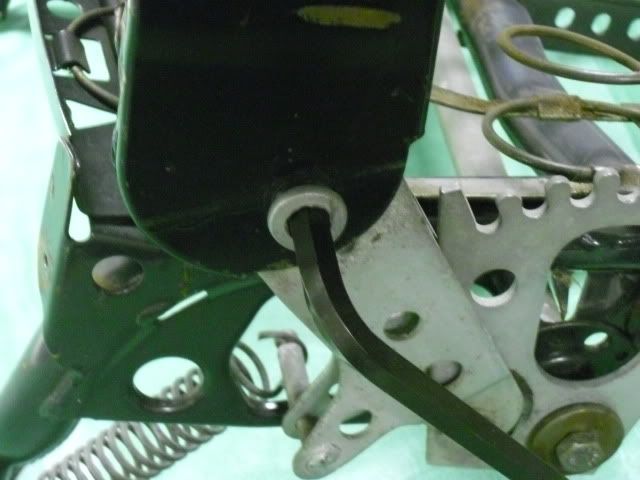
Would like to separate the seat sections but not sure what tool i need to use to get them apart. Thought it was some type of allen wrench but it is larger than I have. Any thoughts?

Keep working at it and it gets done!!
Re: AoT's White Wonder
Get a bigger allen wrench. Measure it across the flats in MM. I'm sure one of us has it for you to borrow.AoT wrote: Thought it was some type of allen wrench but it is larger than I have. Any thoughts?
-
AoT
- Posts: 1029
- Joined: Fri Oct 17, 2008 8:09 pm
- First Name: Audrey
- Vehicle Year: 1974
- Model: Beetle
- Location: Ready for a road trip....
Re: AoT's White Wonder
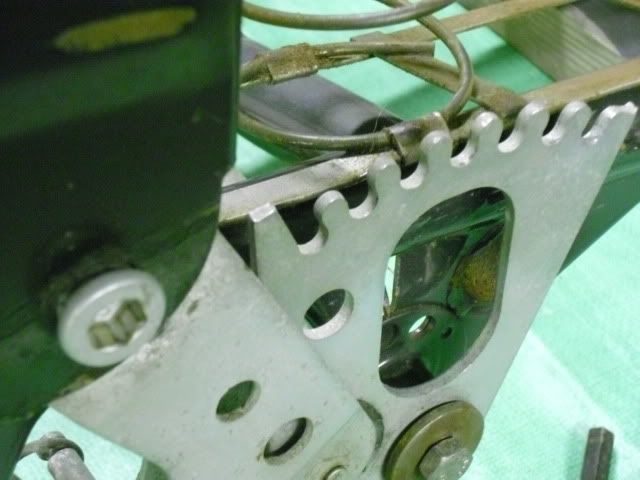
Cleaned out the garage after the winters nap and found an allen wrench to fit the seat bolt.Glenn A wrote:Get a bigger allen wrench. Measure it across the flats in MM. I'm sure one of us has it for you to borrow.AoT wrote: Thought it was some type of allen wrench but it is larger than I have. Any thoughts?
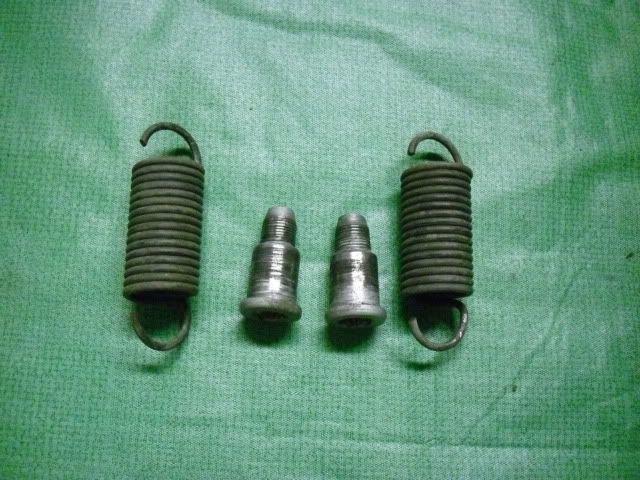
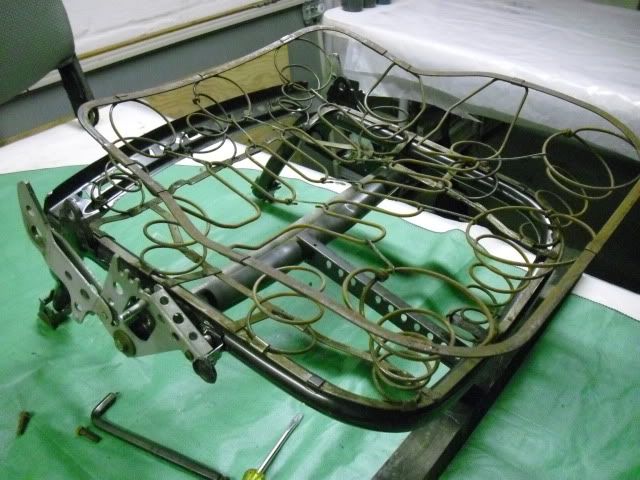
Got the seat back and bottom separated. Those springs pack a lot of punch. Make sure your upwind when you release them. You can see them in action in the above pic.
the seat recliner wasnt going so will try to get the mechanism working when I reconnect the seat
Need to get the seat bottom sprayed and foamed before the cover goes on. Same technique as the rear seat.
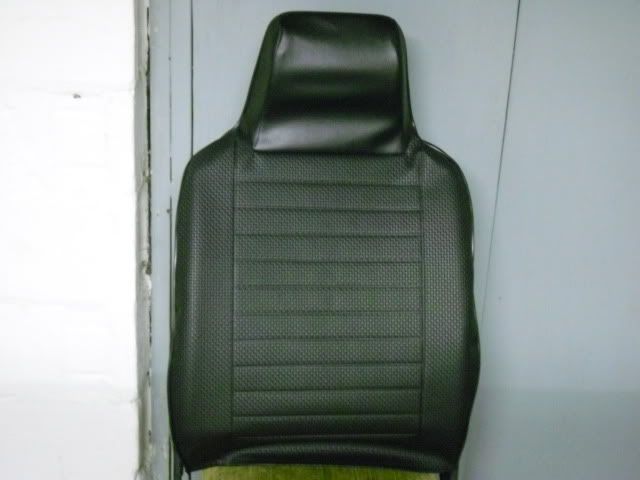
Got the seat back covered. It got a very nice back massage working the cover down. Haven't put it through the bottom prongs yet. Want to let it sit in the sun to warm up so after its stretched it will be a tight fit.
Need some good weather to get the floors POR'ed and painted.
Keep working at it and it gets done!!
-
gotboost79

- Posts: 49
- Joined: Tue Jun 16, 2009 9:01 pm
- First Name: Marc
- Location: Exit 9, NJTPK!
Re: AoT's White Wonder
lookin great!!
Re: AoT's White Wonder
AoT wrote:
Want to let it sit in the sun to warm up so after its stretched it will be a tight fit.
What sun ?
I'm not an air cooled snob , I like them all !
Brown wrote:Tom is right!
-
B MAN

- Posts: 223
- Joined: Sun Jun 14, 2009 4:00 pm
- First Name: Brian
- Vehicle Year: 1972
- Model: Karmann Ghia
- Location: Hempstead NY
Re: AoT's White Wonder
Big_kid wrote:You could make a nice living doing this...
my seats need TLC or i gotta get new ones...
i was thinking Recaro's... or maybe i spend too much time on GlennRing.net =/
@bmannn_
Re: AoT's White Wonder
Nice work. Should look good when it's done.
-
AoT
- Posts: 1029
- Joined: Fri Oct 17, 2008 8:09 pm
- First Name: Audrey
- Vehicle Year: 1974
- Model: Beetle
- Location: Ready for a road trip....
Re: AoT's White Wonder
Thanks! Thought I'd be done by now but falling fences, water in the basement, excavating under my porch and other spring flings took priority.Islandman wrote:
Will look great when you get r done...
Need a little VW time to keep my sanity!
Keep working at it and it gets done!!
-
AoT
- Posts: 1029
- Joined: Fri Oct 17, 2008 8:09 pm
- First Name: Audrey
- Vehicle Year: 1974
- Model: Beetle
- Location: Ready for a road trip....
Re: AoT's White Wonder
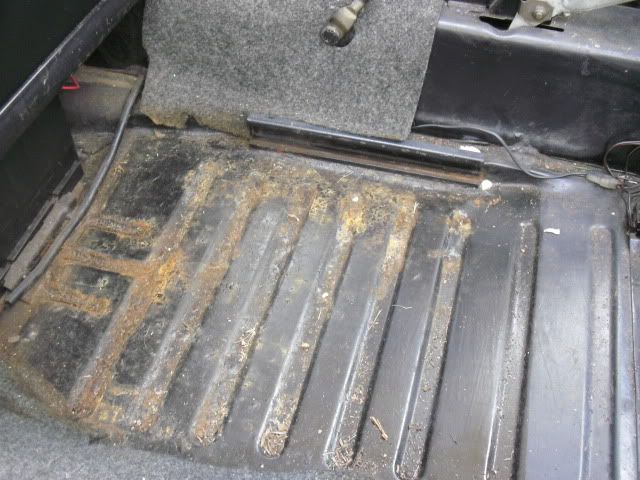
Made some time to work on the floors while the seats are out. Want to POR15 before putting down the boards and carpet.
Gave the PS the prep and will get that done this week and they still seem solid..
but then took a peek at the DS and was not happy...OUCH
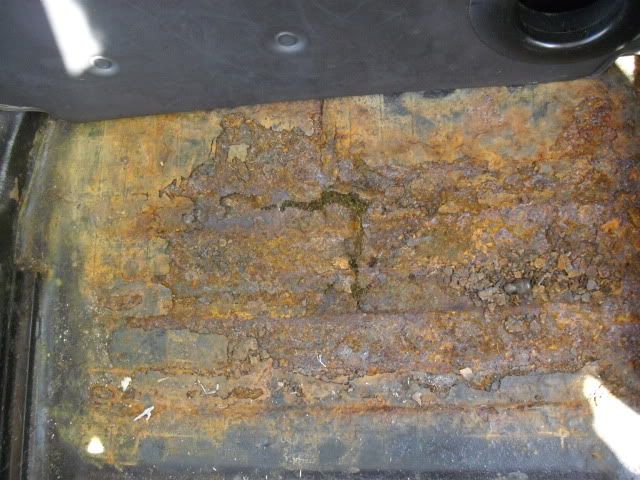
Put some sheet metal down to prevent any injuries but the Flintstone effect will have to be repaired.
I knew it was failing but now its a goner!
Gave the PS the prep and will get that done this week and they still seem solid..
but then took a peek at the DS and was not happy...OUCH
Put some sheet metal down to prevent any injuries but the Flintstone effect will have to be repaired.
I knew it was failing but now its a goner!
Keep working at it and it gets done!!
Re: AoT's White Wonder
I have a quarter floor pan. I think it is for that side. You can have it.
-
Brown
- Posts: 653
- Joined: Sun Sep 14, 2008 8:13 pm
- First Name: Ken
- Location: South Shore of Nassau County
Re: AoT's White Wonder
Give the the Bee a call maybe he can come over and weld it up for you!!!! 
"THE BLEEDER"
-
Glenn
- Posts: 3207
- Joined: Tue Sep 09, 2008 4:20 pm
- First Name: Glenn
- Vehicle Year: 1974
- Model: Beetle
- Location: Long Island, New York, USA
- Contact:
Re: AoT's White Wonder
Damn....Brown wrote:Give the the Bee a call maybe he can come over and weld it up for you!!!!
Glenn
74 Beetle Specs | 74 Beetle Restoration | 2180cc Engine
"You may not get what you pay for, but you always pay for what you get"
When you mess with the bull, you get the horns.
74 Beetle Specs | 74 Beetle Restoration | 2180cc Engine
"You may not get what you pay for, but you always pay for what you get"
When you mess with the bull, you get the horns.