I would think that if my gas tank has thin spots anywhere I rather they puncture when I'm cleaning the tank outside the car than when the tank is back in the car, realize that a gas tank in a bus goes behind the engine and the motor has to come out to be cleaned up or replaced, not in the open trunk area like any other Volkswagen. Doing things twice is for rookies or wanna bes like our friend Glenn A.Raj wrote:Good tip Charlie.Big_kid wrote:When I worked at the lawnmower shop and we had to clean out a metal tank, we'd remove it, drain it, put some gas in it, then add a handful of nuts, bolts, etc, seal it up and shake it up really well. That would break loose the buildup so it would come out. 2 or 3 rounds of this usually did the trick, but sometimes it would reveal holes where the tank was eaten through.
Good luck with yours!
I use a metal chain instead of bolts as it has less sharp edges to puncture thin metal.
'71 White Wagon
Forum rules
Please recycle your forum, and utilize the same chat for all projects related to a single vehicle.
We recommend a broad title such as your name, car year and model; such that it is applicable to whatever projects you tackle.
For issues related to a vehicle specific part, aftermarket accessories, or replacement parts please include the year, model, and application.
For engine related questions also include your engine size and configuration, along with any upgrades or modifications.
-
mannys66
Re: '71 White Wagon

Re: '71 White Wagon
The next step I do is coat the entire inside with a por 15 gas tank sealer style product. It a) seals the rust in to stop any shit form getting loose in the fresh gas, and b) adds a nice solid layer to build up the thin metal. I have even sealed shut a pin hole leak. Just an idea if the tank you are running is kinda rare or difficult to replace. But hear what your saying Manny about the location of the tank vs a T1. I would tend to be more cautious then too.mannys66 wrote: I would think that if my gas tank has thin spots anywhere I rather they puncture when I'm cleaning the tank outside the car than when the tank is back in the car, realize that a gas tank in a bus goes behind the engine and the motor has to come out to be cleaned up or replaced, not in the open trunk area like any other Volkswagen. Doing things twice is for rookies or wanna bes like our friend Glenn A.
Glenn wrote:I have to say, this "gruppe" is so much more than just a car club.
MrBreeze wrote: This is the DVG board. The threads flow as they flow.
Deal with it.
Re: '71 White Wagon
I'm not an air cooled snob , I like them all !
Brown wrote:Tom is right!
Re: '71 White Wagon
I still think you should call it "WonderBus" .
I'm not an air cooled snob , I like them all !
Brown wrote:Tom is right!
-
AoT
- Posts: 1029
- Joined: Fri Oct 17, 2008 8:09 pm
- First Name: Audrey
- Vehicle Year: 1974
- Model: Beetle
- Location: Ready for a road trip....
Re: '71 White Wagon
It has a nice ring to it and I really enjoyed referring to the bug as the "wonder" since there was a lot of wondering what I was doing when I got it and and the adventure is starting over again.Tom wrote:I still think you should call it "WonderBus" .
Keep working at it and it gets done!!

Re: '71 White Wagon
Wow lots of hear say on this thread and all sorts of new ideas. My most recent experience happens to be with a 1 year only type one tank. I put in a large hand full of sheetrock screws and a hand full of half inch by half inch bolts. According to the Eastwood fuel tank sealer instructions shake the tank till you can't feel you arms, then shake it some more. I will do the same thing to my bus tank. If it was to produce a leak I would replace the tank. You want to build a driver. Do it right once. Don't be the guy on the side of the road!
-
AoT
- Posts: 1029
- Joined: Fri Oct 17, 2008 8:09 pm
- First Name: Audrey
- Vehicle Year: 1974
- Model: Beetle
- Location: Ready for a road trip....
Re: '71 White Wagon
Nope, I don't want to be the guy on the side of the road!Glenn A wrote:Do it right once. Don't be the guy on the side of the road!
Read thru the Bentley book last night about taking the fuel tank out and i think thats what i need to do. The only issue is getting the engine out of the way.
Thanks for the input.
Keep working at it and it gets done!!
Re: '71 White Wagon
Aud, I'm down for most Sundays mornings.
Glenn wrote:I have to say, this "gruppe" is so much more than just a car club.
MrBreeze wrote: This is the DVG board. The threads flow as they flow.
Deal with it.
-
Kermit

- Posts: 65
- Joined: Mon Nov 15, 2010 11:49 pm
- First Name: Kermit
- Vehicle Year: 1969
- Model: Beetle
- Location: New York, NY
Re: '71 White Wagon
I'm down to watch anytime — Saturdays work better for me (my garage is closed on Sundays), but I'm not the source of skills here. I'm just the source of beer or snacks.
Glenn wrote:DVG, we see all.
-
Glenn

- Posts: 3207
- Joined: Tue Sep 09, 2008 4:20 pm
- First Name: Glenn
- Vehicle Year: 1974
- Model: Beetle
- Location: Long Island, New York, USA
- Contact:
Re: '71 White Wagon
Trust me... we'll put you to work.Kermit wrote:I'm down to watch .
Don't wear cloths that you don't want to get dirty. That's how you learn and build confidence.
Glenn
74 Beetle Specs | 74 Beetle Restoration | 2180cc Engine
"You may not get what you pay for, but you always pay for what you get"
When you mess with the bull, you get the horns.
74 Beetle Specs | 74 Beetle Restoration | 2180cc Engine
"You may not get what you pay for, but you always pay for what you get"
When you mess with the bull, you get the horns.

-
AoT
- Posts: 1029
- Joined: Fri Oct 17, 2008 8:09 pm
- First Name: Audrey
- Vehicle Year: 1974
- Model: Beetle
- Location: Ready for a road trip....
Re: '71 White Wagon
Asked BusBBQ over for a look at the brakes. The rear brake cylnders and shoes need to be replaced. Hoses look ok. Front pads and rotors are good. Looks like they were redone in 2007. Emergency brake cables need to be replaced. Have to order up the parts for next weekend. Thanks for the help Bill.
Spent this great afternoon cleaningout the bus. Tookout all the damaged ceiling and looks much better. Need to start getting the seats redone. Love the inspiration a beautiful spring day brings.
Spent this great afternoon cleaningout the bus. Tookout all the damaged ceiling and looks much better. Need to start getting the seats redone. Love the inspiration a beautiful spring day brings.
Keep working at it and it gets done!!
Re: '71 White Wagon
AoT wrote:Love the inspiration a beautiful spring day brings.
X2! See you next weekend!
Glenn wrote:I have to say, this "gruppe" is so much more than just a car club.
MrBreeze wrote: This is the DVG board. The threads flow as they flow.
Deal with it.
-
AoT
- Posts: 1029
- Joined: Fri Oct 17, 2008 8:09 pm
- First Name: Audrey
- Vehicle Year: 1974
- Model: Beetle
- Location: Ready for a road trip....
Re: '71 White Wagon
Here are some pic of the bus cleanup/cleanout.
It was a storage locker over the winter, but spring is happening and time to move
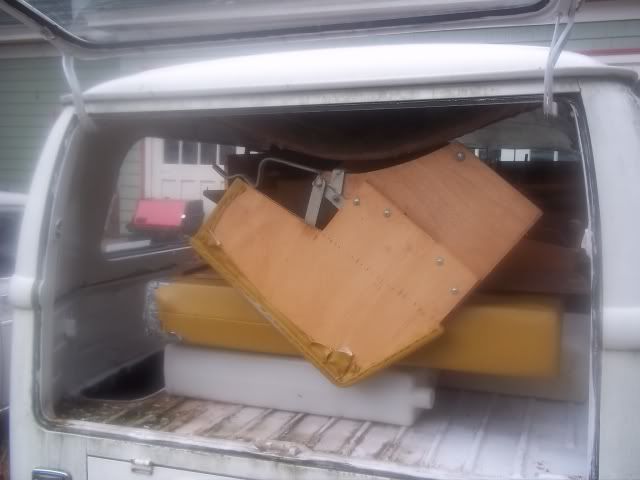
Getting ready for camping.
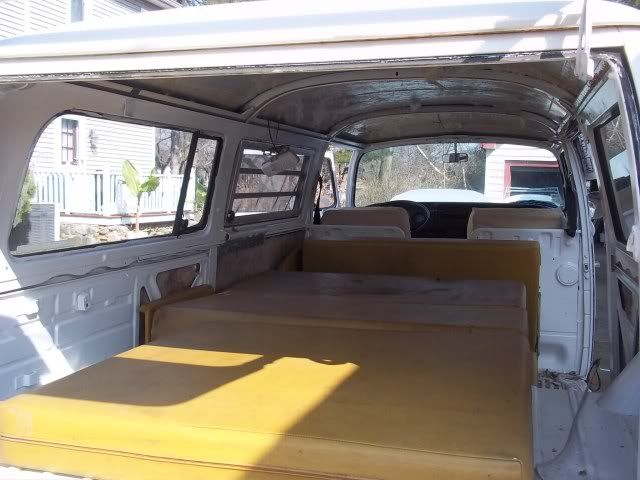
Took off all the paneled headliners and it makes a huge difference, no more low hanging, smelly wood. Took measurements of all the removed pieces for when I redo the ceiling.
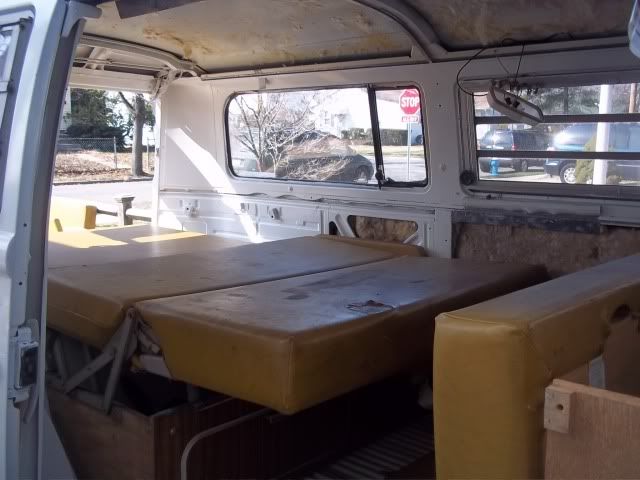
Not even a wash, just a good sweep with the broom.
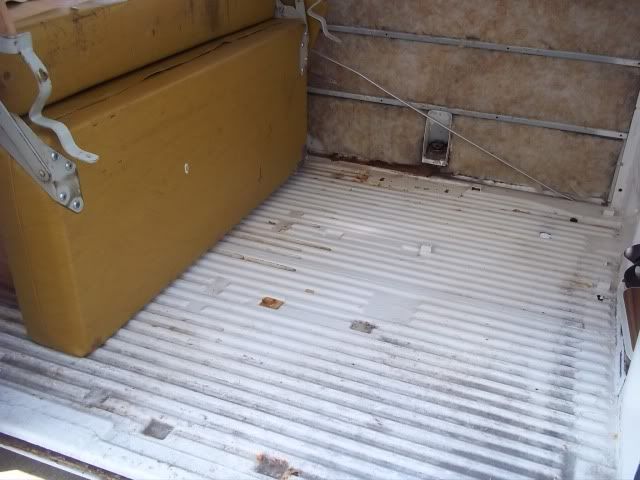
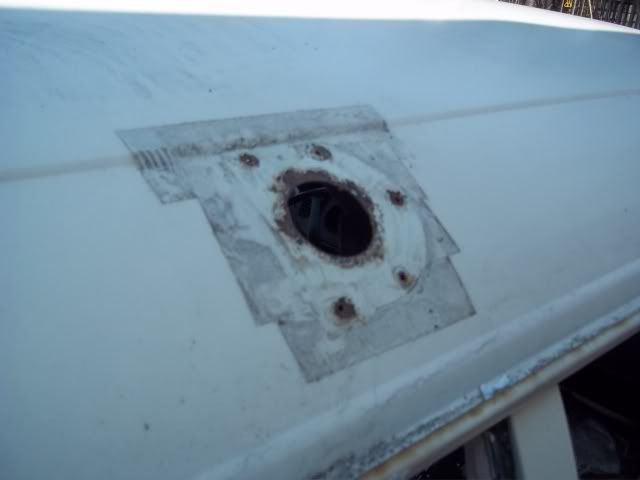
This vent portal was left open to the elements so I covered it with duct tape to keep the rain out. Will get the adhesive off when the weather is warmer.
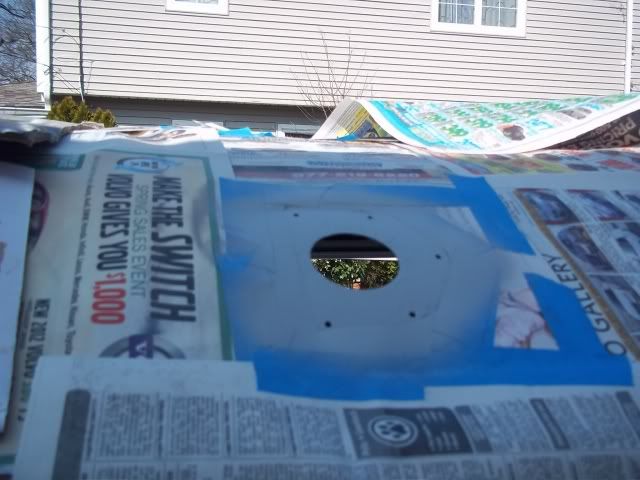
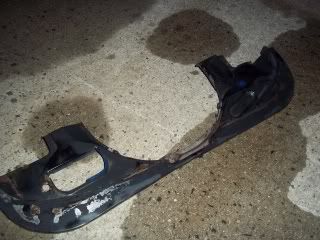
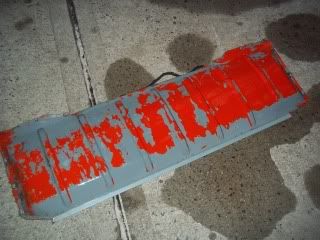
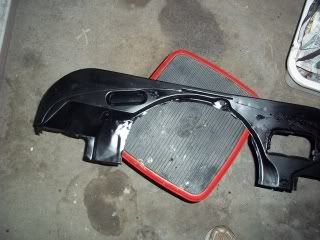
Picked up the cover from my bus pick two weeks ago so I clean off all the caulking and gave it a spray of primer and paint,
New cover in place after a smear of new caulk, need to get some type of flange to keep any run off from getting inside
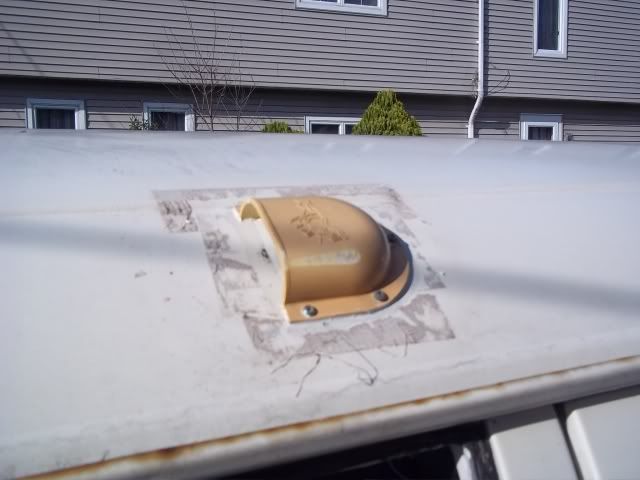
Worth the effort!
It was a storage locker over the winter, but spring is happening and time to move
Getting ready for camping.
Took off all the paneled headliners and it makes a huge difference, no more low hanging, smelly wood. Took measurements of all the removed pieces for when I redo the ceiling.
Not even a wash, just a good sweep with the broom.
This vent portal was left open to the elements so I covered it with duct tape to keep the rain out. Will get the adhesive off when the weather is warmer.
Picked up the cover from my bus pick two weeks ago so I clean off all the caulking and gave it a spray of primer and paint,
New cover in place after a smear of new caulk, need to get some type of flange to keep any run off from getting inside
Worth the effort!
Keep working at it and it gets done!!
-
dubstar
- Posts: 162
- Joined: Fri Jun 05, 2009 9:44 am
- First Name: John
- Location: Long Beach, New York
- Contact:
Re: '71 White Wagon
looks good...did you sort out what extra camping interior pieces you won't be using yet?
john aka dubstar
1963 Type 2 Kombi
1977 Type 1 FI
wanted: any year / condition split window middle and rear seats for the '63
"oh ya! the bus has tires that hold air now and all drums are freeded"
1963 Type 2 Kombi
1977 Type 1 FI
wanted: any year / condition split window middle and rear seats for the '63
"oh ya! the bus has tires that hold air now and all drums are freeded"
-
AoT
- Posts: 1029
- Joined: Fri Oct 17, 2008 8:09 pm
- First Name: Audrey
- Vehicle Year: 1974
- Model: Beetle
- Location: Ready for a road trip....
Re: '71 White Wagon
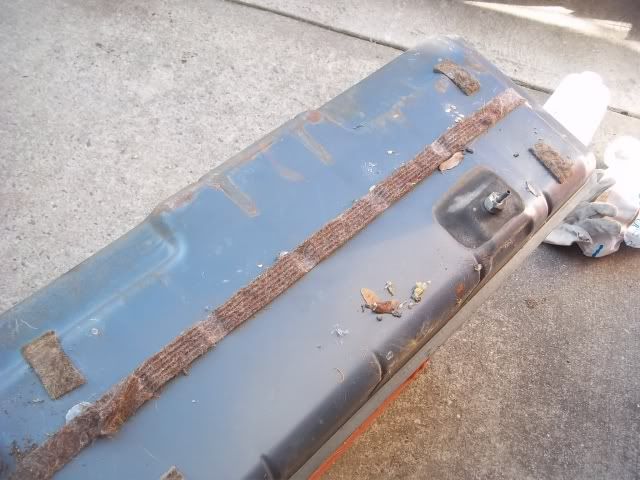
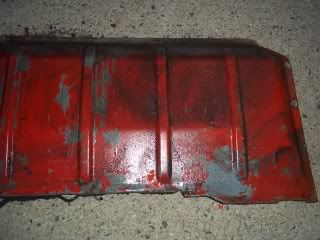
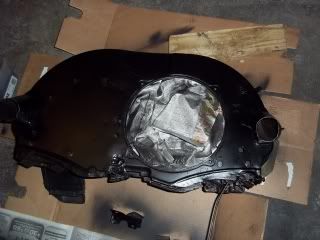
Started getting the fuel tank prepped. This is the one I picked a few weeks ago.
It is solid and I dont' see any pin holes.
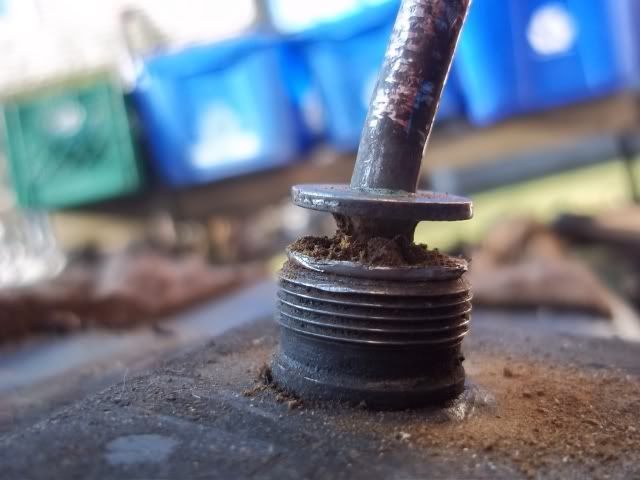
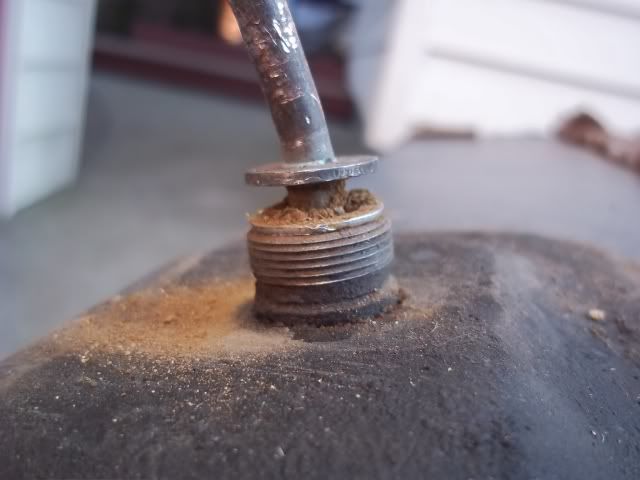
Had some trouble getting the stem out of the tank. Even called BusBBQ to see if there was another unseen thread. The stem did not budge. Did a little tapping and used a utility knife to get under the seam. Finally broke the seal and was met with this gummy mess.
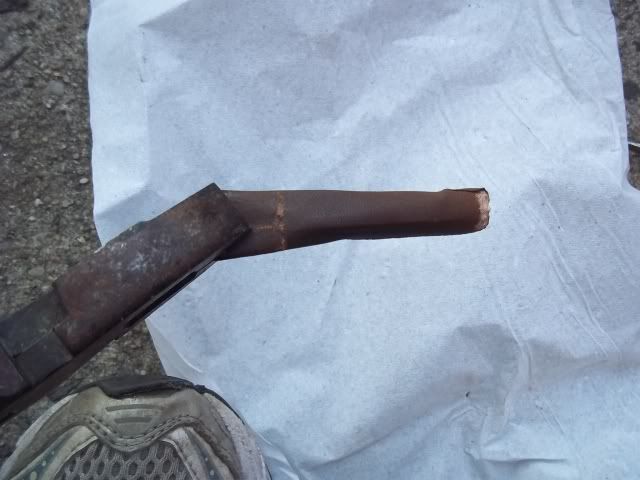
The screen did not come out with the stem so I pushed a screwdriver in and met some resistance. Kept poking and finally broke thru and heard it drop. This is what appeared when I turned it over, a mummified finger!! Don't think I would get much gas flow through this.
This pile of rust also came loose and dry!
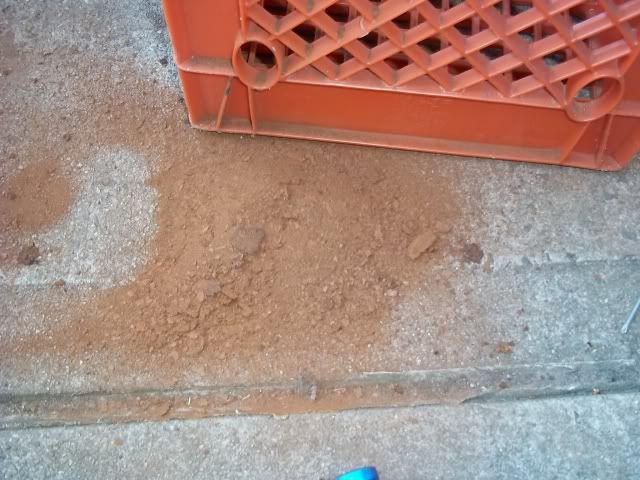
Started the marine clean process. the first drop was like coffee and gave it three treatments. Will do one more tonight and then get going on the metal ready. The tank sealer needs a few days to dry.
Ordered the parts for the tech session.
It is solid and I dont' see any pin holes.
Had some trouble getting the stem out of the tank. Even called BusBBQ to see if there was another unseen thread. The stem did not budge. Did a little tapping and used a utility knife to get under the seam. Finally broke the seal and was met with this gummy mess.
The screen did not come out with the stem so I pushed a screwdriver in and met some resistance. Kept poking and finally broke thru and heard it drop. This is what appeared when I turned it over, a mummified finger!! Don't think I would get much gas flow through this.
This pile of rust also came loose and dry!
Started the marine clean process. the first drop was like coffee and gave it three treatments. Will do one more tonight and then get going on the metal ready. The tank sealer needs a few days to dry.
Ordered the parts for the tech session.
Keep working at it and it gets done!!
Re: '71 White Wagon
sweet..... you'll def find some nastiness in there. Good move getting this all squared away for Sunday install. She needs to get filly dry before you add fresh gas. good work like usual!
Glenn wrote:I have to say, this "gruppe" is so much more than just a car club.
MrBreeze wrote: This is the DVG board. The threads flow as they flow.
Deal with it.
-
gotboost79

- Posts: 49
- Joined: Tue Jun 16, 2009 9:01 pm
- First Name: Marc
- Location: Exit 9, NJTPK!
Re: '71 White Wagon
lookin good! With this weather, you should be cruisin in no time!
-
AoT
- Posts: 1029
- Joined: Fri Oct 17, 2008 8:09 pm
- First Name: Audrey
- Vehicle Year: 1974
- Model: Beetle
- Location: Ready for a road trip....
Re: '71 White Wagon
Working on getting all the pieces ready to put the tank and engine back in. Lots of degreasing and washing and got some of the tins zapped with some spray paint for a pick me up!
Slideshow of the progress.
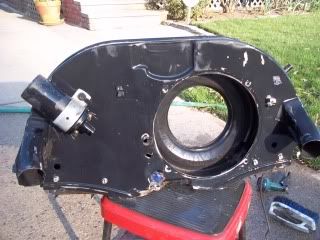

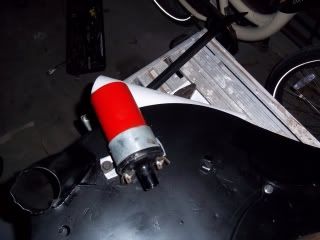
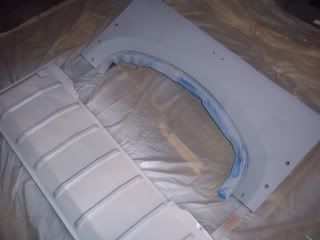
I primed the interior fuel panel and the rear deck, but too anxious to get it painted and the paint crinkled on the fuel door from the cold so start gain tomorrow!
Slideshow of the progress.
I primed the interior fuel panel and the rear deck, but too anxious to get it painted and the paint crinkled on the fuel door from the cold so start gain tomorrow!
Keep working at it and it gets done!!
-
Glenn
- Posts: 3207
- Joined: Tue Sep 09, 2008 4:20 pm
- First Name: Glenn
- Vehicle Year: 1974
- Model: Beetle
- Location: Long Island, New York, USA
- Contact:
Re: '71 White Wagon
Another productive day. My 8mm Allen bit drive gave it's life so the axles could be removed but after all is done, the axles are off.
Glenn
74 Beetle Specs | 74 Beetle Restoration | 2180cc Engine
"You may not get what you pay for, but you always pay for what you get"
When you mess with the bull, you get the horns.
74 Beetle Specs | 74 Beetle Restoration | 2180cc Engine
"You may not get what you pay for, but you always pay for what you get"
When you mess with the bull, you get the horns.
-
AoT
- Posts: 1029
- Joined: Fri Oct 17, 2008 8:09 pm
- First Name: Audrey
- Vehicle Year: 1974
- Model: Beetle
- Location: Ready for a road trip....
Re: '71 White Wagon
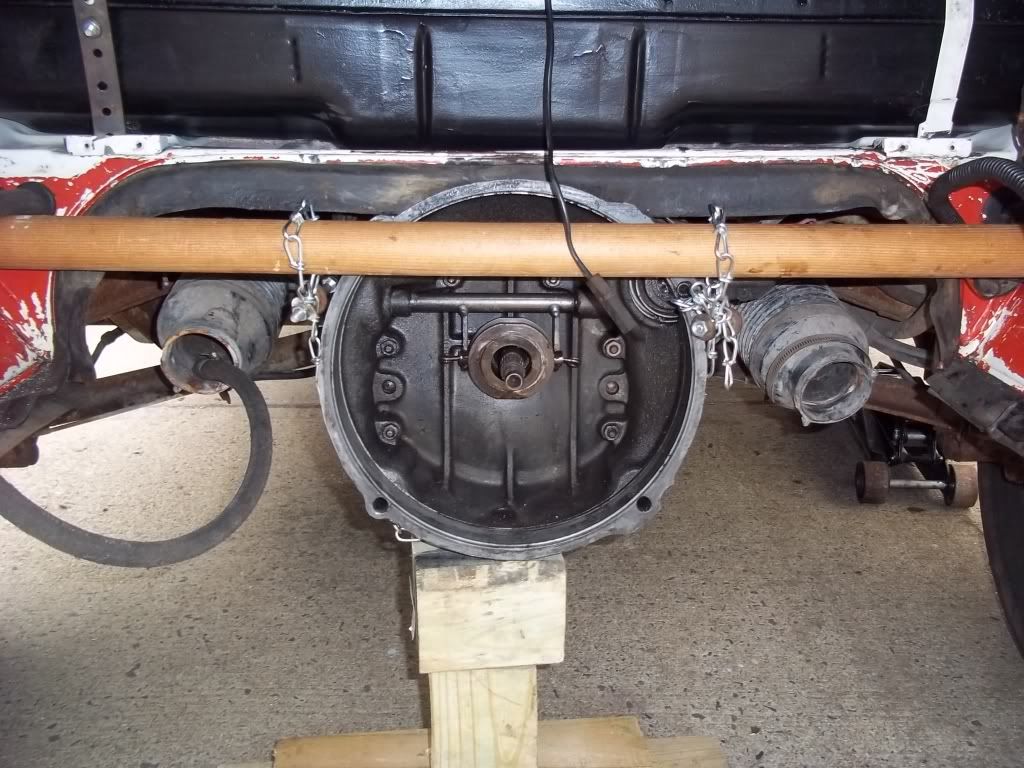
Thanks Glenn for your time today aside from getting the axles off we also got the engine put back together. Things are taking shape. We also made a temp hitch to keep the tranny up so i can move the bus around.
After GR headed out i put the fuel tank back with the sender and got it installed. More info and pics later after i warm up and have some lunch at 4:30!
Good work today. Thanks GR i owe you some parts.
After GR headed out i put the fuel tank back with the sender and got it installed. More info and pics later after i warm up and have some lunch at 4:30!
Good work today. Thanks GR i owe you some parts.
Keep working at it and it gets done!!
Re: '71 White Wagon
Just a thought , I have read posts on thesamba that a lot of people put insulation on that gas tank cover to cut down on cabin noise.
I'm not an air cooled snob , I like them all !
Brown wrote:Tom is right!
-
AoT
- Posts: 1029
- Joined: Fri Oct 17, 2008 8:09 pm
- First Name: Audrey
- Vehicle Year: 1974
- Model: Beetle
- Location: Ready for a road trip....
Re: '71 White Wagon
I have one of the movers quilt i couls lay over. Thanks for the post before the engine was in.Tom wrote:Just a thought , I have read posts on thesamba that a lot of people put insulation on that gas tank cover to cut down on cabin noise.
Hope your fun in the sun was good.
Keep working at it and it gets done!!
-
AoT
- Posts: 1029
- Joined: Fri Oct 17, 2008 8:09 pm
- First Name: Audrey
- Vehicle Year: 1974
- Model: Beetle
- Location: Ready for a road trip....
Re: '71 White Wagon
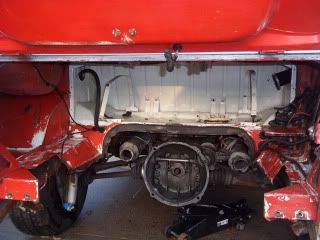
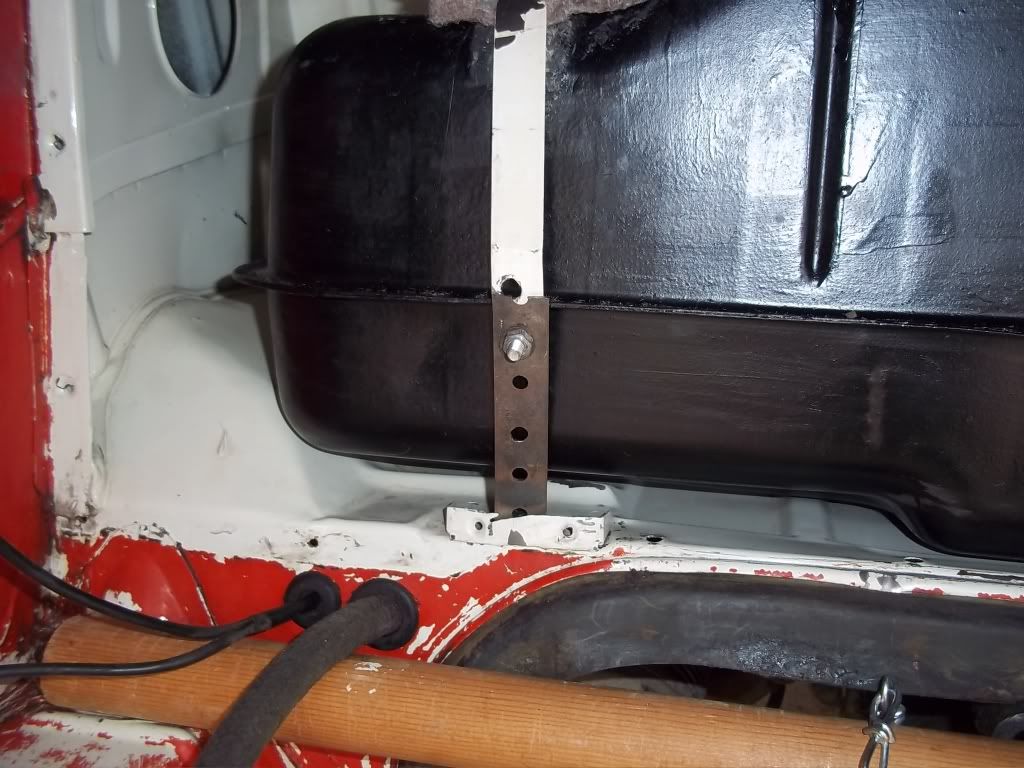
Pics of the fuel tank in place and the strap I had to recreate as the original got twisted.
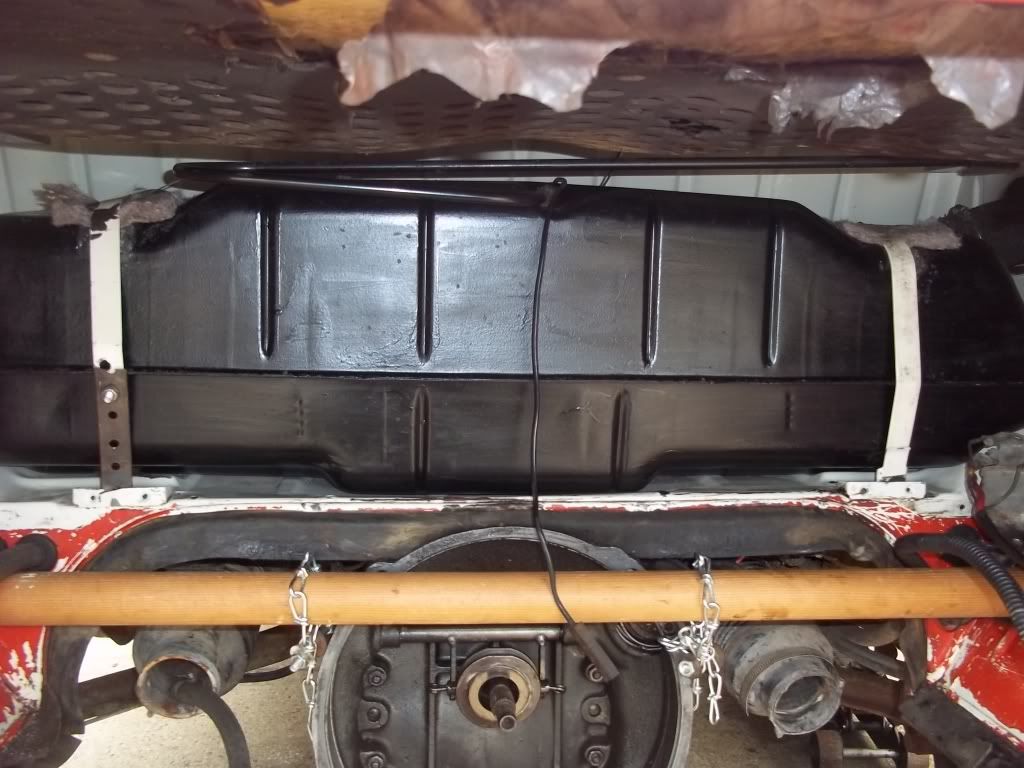
Of course the first hole I drilled ws just at the seam line of the tank so I dropped it down. Got a round head screw on the inside to avoid any rubbing.
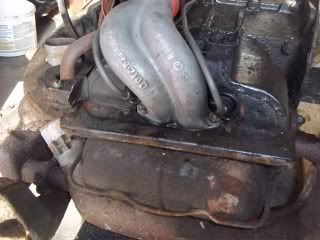
Engine put back together and looks pretty good. Hope it works just as well.
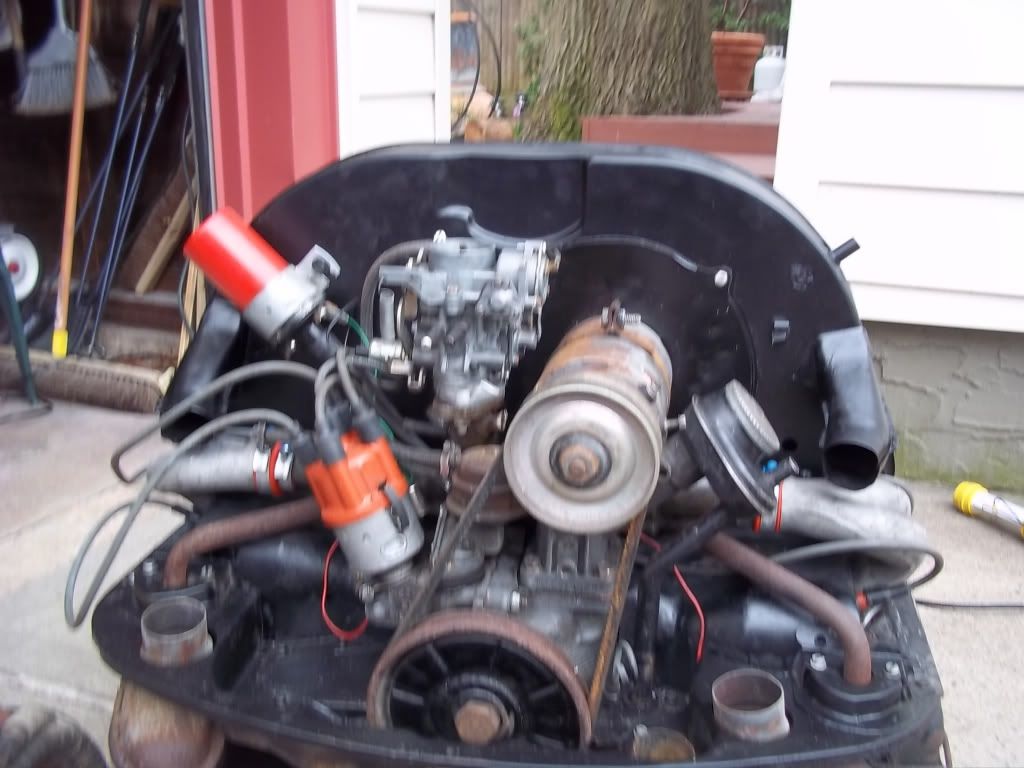
Tins always look better with a fresh coat of satin black.
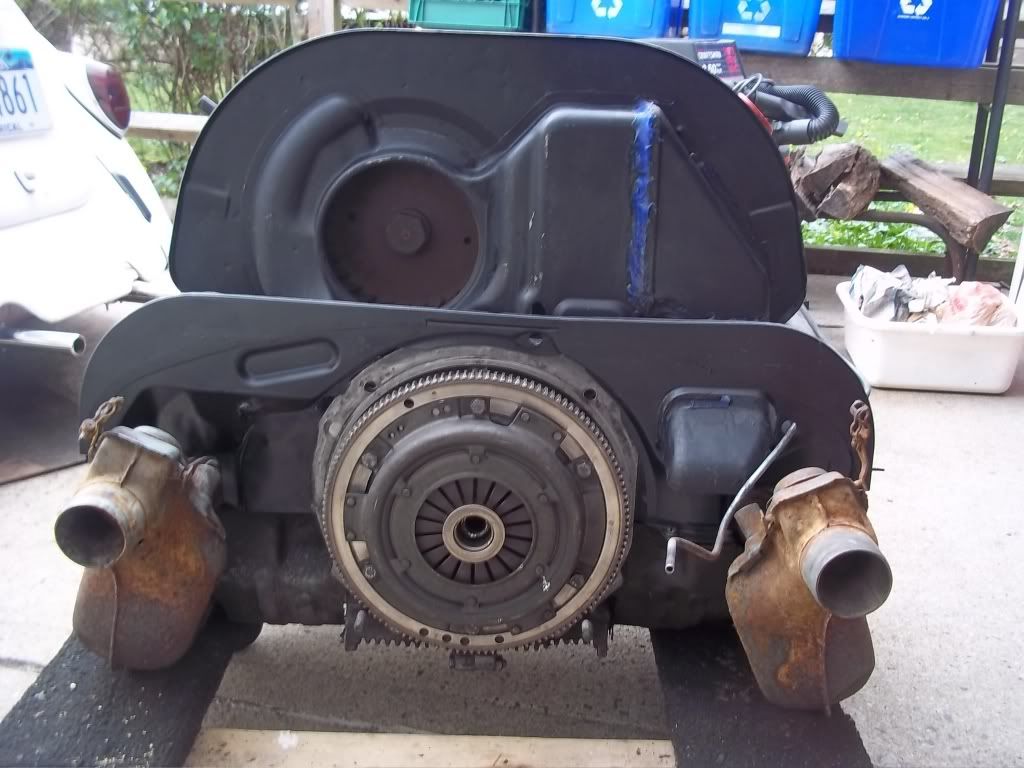
GR and I made a hoist for the tranny while the bus is is repair. Axles out and off to be rebuilt!
One step closer!
Of course the first hole I drilled ws just at the seam line of the tank so I dropped it down. Got a round head screw on the inside to avoid any rubbing.
Engine put back together and looks pretty good. Hope it works just as well.
Tins always look better with a fresh coat of satin black.
GR and I made a hoist for the tranny while the bus is is repair. Axles out and off to be rebuilt!
One step closer!
Keep working at it and it gets done!!